
Deliver At All Costs offers a wild variety of wacky blueprints and gadgets to upgrade Winston’s truck. From time control to a literal jet engine, Konami and Far Out Studios have given players a truly wondrous set of contraptions at Winston’s fingertips. These gizmos aren’t free, though, requiring their own set of parts before Winston hits the garage.
Related
10 Racing Game Hidden Gems You Need to Play
Leave your AAA racers in the pit lane.
New players might be tempted to visit the store and burn some of that hard-earned cash from Winston’s deliveries, but more industrious fans might figure out that hidden throughout Deliver At All Costs are chests, ripe for the taking, with all the parts you’ll ever need. You need to find them first, though.
Chests, What They Are, And How To Spot Them

When Winston returns home from his first day of work at We Deliver, he’ll hear Mr. Palmer complaining about not having rations on the rooftop. This conversation will set the player on their first encounter of the game, titled Mr. Palmer & The Giant Worms.
The encounter will send Winston across several rooftops, ending up on a rooftop across from the motel where he’s currently living. Mr. Palmer’s Emergency Rations and a Circuit Board are held in the chest on the rooftop of that building.
This chest will be the first of many that Winston comes across on his journey through Deliver At All Costs.
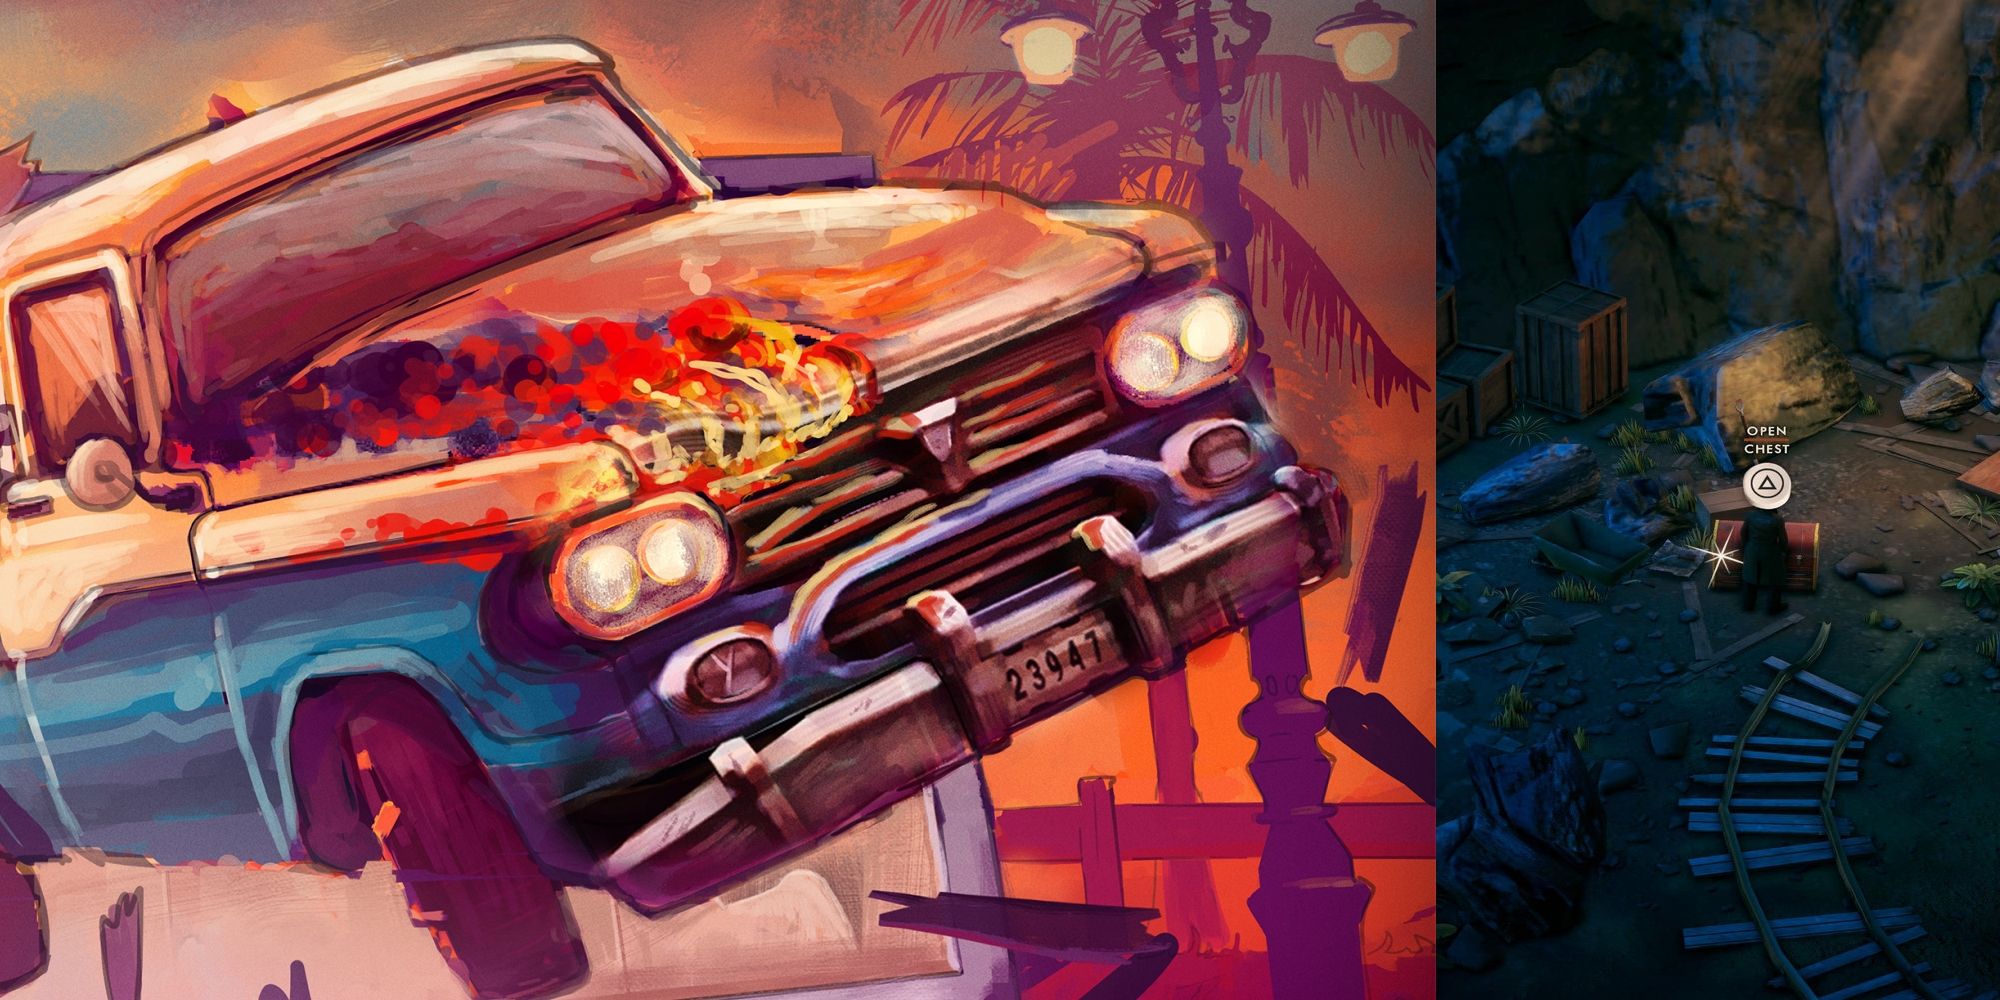
Chests are large red toolboxes with yellow trim. They can be spotted easily, not only by their shape, but because of the glint that shines along the corner of the chest’s lid.
Given the static alignment of the camera, occasionally the player may need to change its position in order to see the chest. Though not all chests are visible, most can be seen by either of the two camera angles provided.
Deliver At All Costs is split up into three acts, giving Winston access to a new region with each act. This guide will cover the chests in each region by act.
While most of the chests can be acquired throughout the game, it’s best to wait until after the game is finished to gather all the chests. Some may be locked until story events have taken place, and only the chests within the We Deliver building must be obtained within their act.
We Deliver Building Acts 1 & 2 Including Winston’s Hideout
|
We Deliver Act 1 Hidden Chest 1 |
Duct Tape x2 |
We Deliver locker room, northwest corner. |
|
We Deliver Act 1 Hidden Chest 2 |
Rope x2 |
We Deliver third floor, northeast corner. |
|
We Deliver Act 2 Hidden Chest 1 |
Duct Tape x2 |
We Deliver warehouse, hidden, northeast corner. |
|
We Deliver Act 2 Hidden Chest 2 |
Battery x2 |
We Deliver, third floor, southwest corner. |
|
Winston’s Hideout Hidden Chest 1 |
Battery x2 |
Winston’s Hideout, sewer path, on the immediate left on entry from outside. |
Reefside
|
Reefside Hidden Chest 1 |
Spare Parts |
Before crossing the main bridge into St. Monique, on top of the lighthouse. |
|
Reefside Hidden Chest 2 |
Spare Parts x2 |
Mid-way across the big under-construction bridge, after crossing ledges. |
|
Reefside Hidden Chest 3 |
Rope x2 |
South side of the third island, along a ridge overlooking the ocean. |
|
Reefside Hidden Chest 4 |
Circuit Board |
Launch off the ramp to the disconnected bridge, head east, and it’s to the far edge of the next bridge. |
|
Reefside Hidden Chest 5 |
Rope x2 |
On the beach north of Ms. Granger’s house, just before crossing into Mt. Calahan. |

Related
10 Non-Racing Games With Fun Time Trials
When you gotta go fast, you better be rewarded.
Mt. Calahan
|
Mt. Calahan Hidden Chest 1 |
Rope x2 |
Entrenched in rocks at midway point on Western path, next to Mr. Parker. |
|
Mt. Calahan Hidden Chest 2 |
Duct Tape x2 |
Narrow staircase at midway lookout point, along the mountain. |
Pacifica Boardwalk
|
Pacifica Boardwalk Hidden Chest 1 |
Spare Parts |
On the beach hidden in sand, driving over the sand reveals it. |
|
Pacifica Boardwalk Hidden Chest 2 |
Battery |
Sticking out the side of the big red circus tent. |
|
Pacifica Boardwalk Hidden Chest 3 |
Spare Parts x2 |
Northeastern corner of the tunnel into the mountains, glowing blue with a train track. |
|
Pacifica Boardwalk Hidden Chest 4 |
Duct Tape x2 |
Rooftop of Rick’s Fabrics. There’s ladder access in the parking lot above Polk’s Groceries. |
The Steps
|
The Steps Hidden Chest 1 |
Circuit Board + Emergency Rations |
Story objective, across from the motel Winston is staying at on the rooftop. |
|
The Steps Hidden Chest 2 |
Spare Parts x2 |
South of Port Belle tunnel off the road. Yellow paint takes the player south along the mountains. |
|
The Steps Hidden Chest 3 |
Duct Tape x2 |
North of Port Belle tunnel. Take the raised wooden pathway behind Hillride Hotel & Café. |
St. Monique City
|
St. Monique City Hidden Chest 1 |
Circuit Board |
Drive along the train tracks, at the split take the south route. It’s on an elevated ridge next to the tracks. |
|
St. Monique City Hidden Chest 2 |
Rope x2 |
Between two wooden pedestrian bridges, on an island. |
|
St. Monique City Hidden Chest 3 |
Spare Parts x2 |
Far north, inside a gated home, on the front porch. |
Port Belle
|
Port Belle Hidden Chest 1 |
Circuit Board |
In the northern part of the map, take a hot air balloon ride to a separate island. The chest is on the northwestern part of the island. |
|
Port Belle Hidden Chest 2 |
Duct Tape x2 |
Just south of the main port, climb two ladders to get on top of buildings. Navigate across the warehouse and fall onto a boat. |
|
Port Belle Hidden Chest 3 |
Circuit Board |
Eastern construction yard, atop tall structure with two ladders. Inside the building. |
|
Port Belle Hidden Chest 4 |
Battery x2 |
Further east along the road, inside a tall structure with only one ladder. |
Old Monique
|
Old Monique Hidden Chest 1 |
Duct Tape x2 |
Following the main path, go north when it splits. Jump the gap to land on an island. |
|
Old Monique Hidden Chest 2 |
Battery x2 |
West of the dam, head north. The chest is inside a protected construction yard to the northeastern side. |
Copperhead
|
Copperhead Hidden Chest 1 |
Rope x2 |
In the middle of the western coast, a boat beached in shallow water. |
|
Copperhead Hidden Chest 2 |
Spare Parts x2 |
From the center of the map, follow the main road north. It’s on the east side of the road in a circular field, which is visible from the road. |
Emerald Grove
|
Emerald Grove Hidden Chest 1 |
Battery x2 |
Along the western wall, a mountainous inlet will lead to a camp site with the chest. |
|
Emerald Grove Hidden Chest 2 |
Circuit Board |
In the center of the map inside a park, the public pool is bigger than all other pools. The chest is in the deep end. |
|
Emerald Grove Hidden Chest 3 |
Duct Tape x3 |
In the southeast part of the map, climb down the mountain and cross two bridges to find the chest. |
|
Emerald Grove Hidden Chest 4 |
Spare Parts x2 |
South of the bridge leading to Shellington Falls will be a ladder that leads to the chest. |

Related
10 Best Driving Games With No Racing
No checkered flags in sight, but still plenty of fun to be had!
Shellington Falls
|
Shellington Falls Hidden Chest 1 |
Battery x2 |
When the road splits from Emerald Grove, go south. The Hidden chest is on top of the Gwenn’s Pasteries building. |
|
Shellington Falls Hidden Chest 2 |
Circuit Board |
On the rooftop of the building next to Gwenn’s Pasteries, Pete & Brass Workshop & Manufacturer. |
|
Shellington Falls Hidden Chest 3 |
Duct Tape x2 |
On the rooftop of the We Deliver building. Scale the ladder near the truck depot to reach it. |
|
Shellington Falls Hidden Chest 4 |
Circuit Board |
Northeast of the We Deliver building, on top of the Sofa Dep’t building. |
|
Shellington Falls Hidden Chest 5 |
Rope x2 |
Along the long dock north of Hidden Chest 4, on the boardwalk behind the northernmost shack. |
Tipbend Ridge
|
Tipbend Ridge Hidden Chest 1 |
Duct Tape x2 |
When entering from Shellington Falls, take an immediate right and climb the ledges, then skip the tower and follow the path. |
|
Tipbend Ridge Hidden Chest 2 |
Battery x2 |
You can collect this during the story mission ‘Bull’s Eye’ when getting the net. It’s on the second floor of the lumberyard. |
|
Tipbend Ridge Hidden Chest 3 |
Spare Parts x2 |
Near the exit towards Bellefort. Along the side of the ridge just off the road by the exit is the chest. |
Bellefort
|
Bellefort Hidden Chest 1 |
Battery x2 |
South on the main road when it first splits from Tipbend Ridge, on the second floor of the country club main house. |
|
Bellefort Hidden Chest 2 |
Circuit Board |
The northernmost building in Bellefort is a large mansion. Approach from the west and players can sneak in. |
|
Bellefort Hidden Chest 3 |
Duct Tape x2 |
The second hidden chest overlooks the courtyard where the third chest sits. Players can jump off the catwalk into the courtyard. |
The Crossroads
|
The Crossroads Hidden Chest 1 |
Battery x2 |
Driving straight from Bellefort, the player will run into a drive-in movie theater. The hidden chest is on top of the screen. |
|
The Crossroads Hidden Chest 2 |
Circuit Board |
In the southern part of The Crossroads where the Dirt Devils encounter takes place. The chest is on the track under a tower. |
|
The Crossroads Hidden Chest 3 |
Spare Parts x2 |
On the western part of the map, where many of the roads meet. The chest is in an underpass. |
Hannesburg County
|
Hannesburg County Hidden Chest 1 |
Spare Parts x2 |
Just off the main road on the east, near the center of the map. You might need to change camera angles for this one. |
|
Hannesburg County Hidden Chest 2 |
Rope x2 |
Follow a road that goes west off the main road. The chest will be in a small shack just south of the building at the end of the road. |
Staunton
|
Staunton Hidden Chest 1 |
Circuit Board |
Driving north into Staunton from Hannesburg, take the first left and at the corner will be a crane. The hidden chest is on top of it. |
|
Staunton Hidden Chest 2 |
Duct Tape x2 |
Northeast from the crane with Hidden Chest 1 is an arcade. The chest is on the rooftop, and the ladder is around the back of the building. |
|
Staunton Hidden Chest 3 |
Rope x3 |
In the northwest corner near the entrance to Sloane is a thin plank walkway onto a boat. The chest is on the boat. |
Sloane
|
Sloane Hidden Chest 1 |
Spare Parts x2 |
Just northwest of Winston’s Hideout is a garage with some scaffolding behind the building. Climb the scaffolding to find the chest under the water tower. |
|
Sloane Hidden Chest 2 |
Circuit Board |
Due west from Hidden Chest 1 is a lighthouse. Simply climb the ladder and the chest is on the top floor. |
|
Sloane Hidden Chest 3 |
Battery x3 |
In the northwest corner of the map is a large building with a ladder on the south side. Climb the ladder and the chest will be on the rooftop. |
Kilner
|
Kilner Hidden Chest 1 |
Circuit Board |
On the south side of the cinema is a ladder to climb onto the rooftop. The chest is on top of the roof. |
|
Kilner Hidden Chest 2 |
Duct Tape x2 |
Northwest of the cinema is the park. The chest is in the northeastern corner of the park. |
|
Kilner Hidden Chest 3 |
Rope x2 |
On the far eastern land mass that’s extending into the water is a diner. Around the side of the diner is a ladder that takes you to the rooftop with the chest. |
|
Kilner Hidden Chest 4 |
Spare Parts x3 |
In the story mission Wheels of Retribution, you’re able to enter the junkyard in the north of Kilner. The chest is in the northwest corner of the junkyard. |
With every chest documented and cleared, players will be on their way to having every available upgrade offered by the blueprints provided in the main story. Most of the blueprints will be found in either story missions or at the shop. If you haven’t visited the shop yet, it’s the large briefcase icon on the map.
How Do These Upgrades Help?

The chest locations are designed to be found and accessed without the need for Winston’s gadgets, but the jet engine is most likely to assist, especially with those pesky Reefside chests. The blueprints can be purchased at any of the stores in Deliver At All Costs.
If the player is struggling with missions, or just driving a little more elegantly and less like a stunt driver, the time control upgrade will be a big priority. The ability to fine tune Winston’s movements while driving should help immensely.
Of course, if the player is looking to bother just about everyone in any region they’re visiting, they can’t go wrong with the hell horn. Creating a loud horn noise that takes out all the windows in a city block simply cannot be beat when it comes to causing havoc, making it one of the most hilarious gadgets in this Konami-published indie game.

Next
10 Best Open-World Racing Games
Sometimes it’s all about cruising in the city.