Simple makeover to get that East Coast look with some Beadboard effect wallpaper – Property Auction Dates
Do you have a corner of your house that doesn’t really speak to you and you want a quick and simple way to transform it into something that makes you smile. Well the answer might be easier than you think.
Sometimes just doing a few simple changes can make all the difference and give you a whole new perspective on an area of your house that you never really utilised before. By adding interest to a wall you can completely alter the vibe that is created and make the space welcoming and enjoyable.
Our simple transformation involves putting up some Beadboard effect wallpaper and adding some very small accent pieces which will give the area that US East Coast look that is synonymous with towns like Maine and Boston.
Demo and Preparation
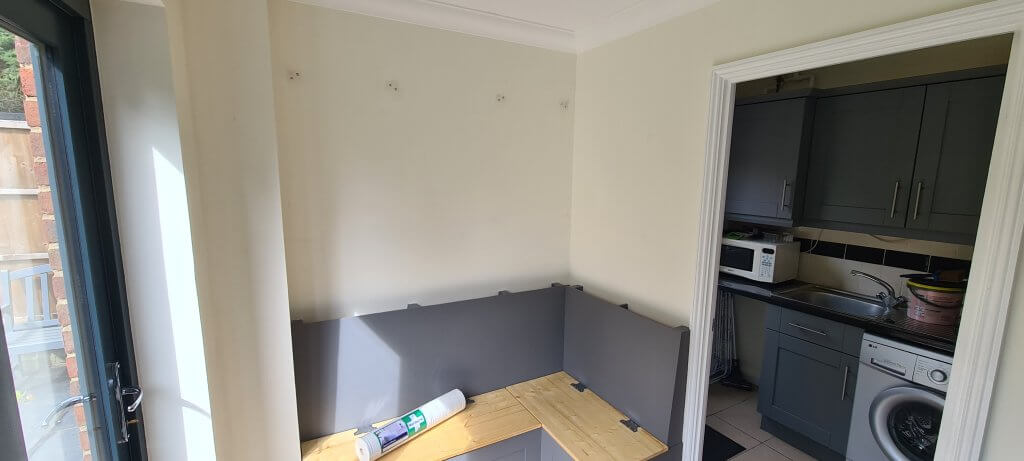
The first job on the list of things to do was to prepare the area ready for us to start putting up the Beadbord wallpaper. This involved taking down the carcasses of the old high level cupboards that were hanging on the wall and removing the old picture frames.
Then next job was to fill in the holes where the brackets had been screwed into the wall and the holes where the pictures had been hung. A lightweight quick dry filler was used so that I didn’t have to wait too long for it to harden off.
Once the filler was dry it was sanded down with a medium grit sandpaper and then the walls were given a clean with a solution of sugar soap mixed with warm water.
Measuring Up
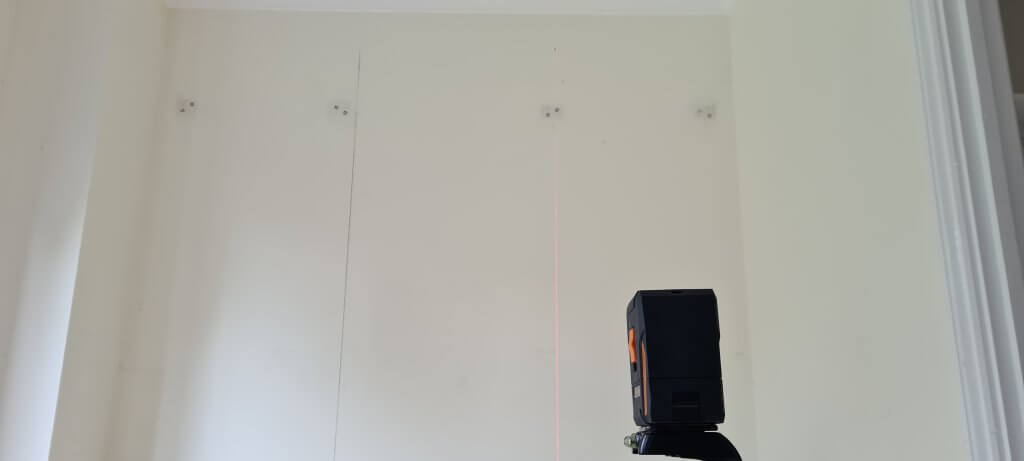
Now the area was nicely prepped it was time to start marking out how the wallpaper was going to be hung. With a laser level I checked the corners for straightness to see if I needed to allow an overlap of the paper when hanging the first sheet. In our case the walls were true so it would just be a case of butting the edge of the first sheet up to the corner without having to cut any overlap off.
Next I measured the width of a piece of wallpaper using the laser line marked a line down the wall to indicate where the edge of the wallpaper should go. You can use a plumb bob and line if you have not got a laser level.
Cutting and Pasting Up
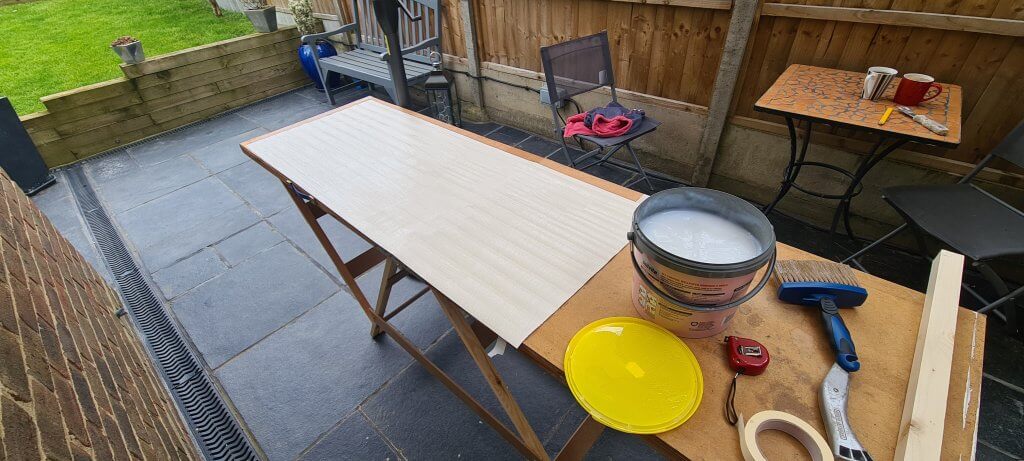
With all the prep done it was now time to start pasting and putting up the wallpaper. Using my trestle pasting table I cut the paper so that I had an inch overlap at the top and bottom and then applied ready mixed wallpaper paste. Ready mixed for ease of use and quickness. While the paste was soaking into to the paper I applied a coat of paste to the wall as well.
After the paste had soaked into the paper for five minutes I held the paper at the top and carefully climbing a pair of steps offered the paper up to the wall being mindful to make sure the edge of the paper butted up the line I drawn.
You have some wiggle room to move the wallpaper around with the palm of you hands before you press it hard into position keeping the overlaps at the top and bottom. Once you are happy with the position of the paper user a paperhangers smoothing and air bubble removing brush to work the paper and flatten out any air bubbles. I also use a rubber roller to aid with the process.
When you are happy with the position and finish of the paper use a decorators straight edge, which gives you a thin and stiff straight edge, to press against the top and bottom of the wallpaper in order to trim off the excess.
After the first sheet of wallpaper is hung it is simply a case of butting up the next sheets to the join each time and trimming off any overlaps into corners accordingly. Make sure you use a new blade on you cutting knife and take your time to make the trims. Don’t worry too much though if you do make a tear when you are trimming as the Beadboard wallpaper is fairly forgiving and it’s relatively easy to splice in some repairs so that no one will ever know there was ever a tear in the first place.
If you have to paper round sockets and switches you can either turn the electric off so that there are no risks of electric shock and loosen the socket to allow the hole in the paper to be cut just bigger than the socket and then be tucked behind the socket or leave the socket in place and cut round the socket and butt the paper up to it. Whatever you do its easier to mark where the socket is on the paper when its been partially hung and cut a cross out diagonally from corner to corner and then cut the tops of the triangles back to be able to tuck them under the socket or trim them to go around the socket.
For papering around doors cut the entire sheet of paper to the just slightly bigger thzn the size required to allow for an overlap and then paste the paper up trimming it to size once it has been smoothed and butted firmly into the corners with the smoothing brush.
Finishing Touches
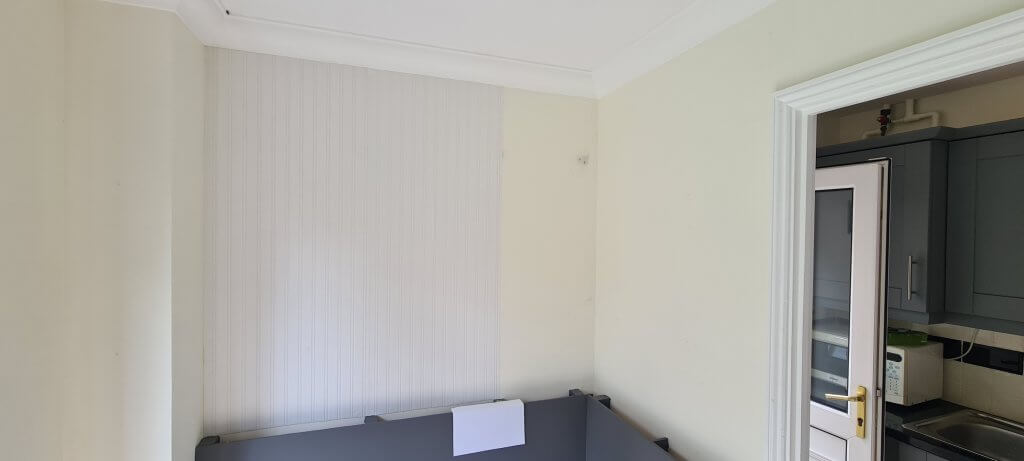
Allow the paper to dry for at least twenty fours hours. At this point I applied a very thin layer of filler down the seem because even though the wallpaper had been firmly butted together the seem was still slightly visible. I made the filler very smooth with a wet filling knife to make sure the finish was not rough.
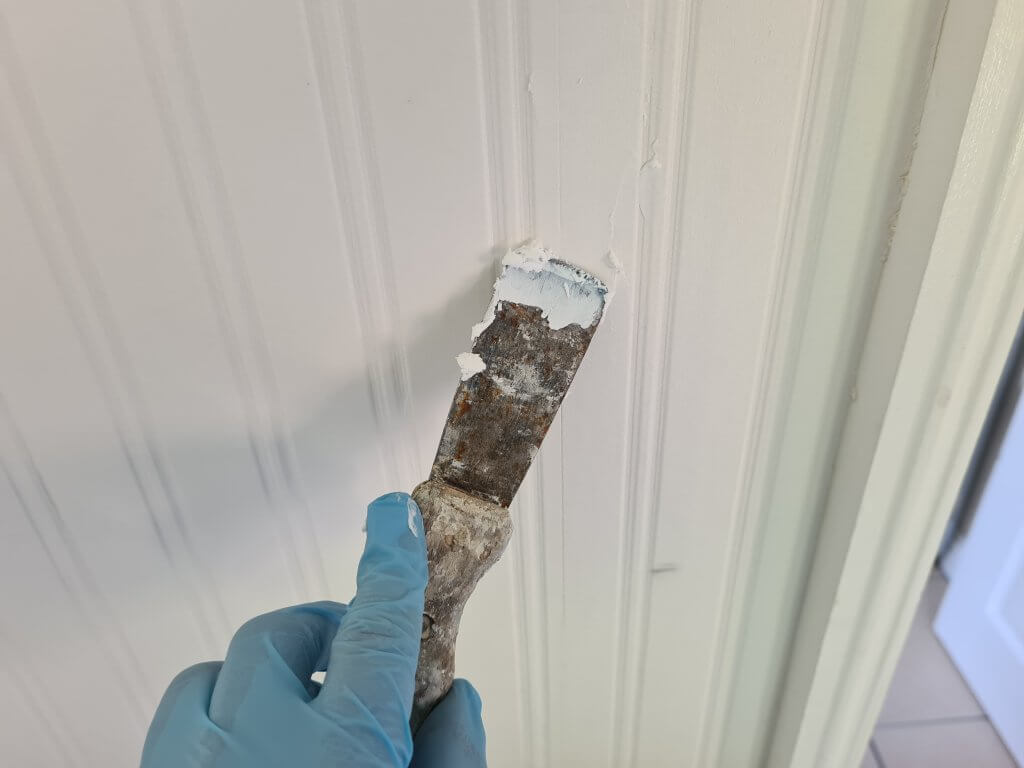
Once the filler was dry I used a fine sandpaper to make sure it was smooth and that is was time for paint. For that definitive East Coast look go for white or a light shade of blue or gray or maybe a pastel shade of mint. Whatever colour you go for make sure it’s not too overbearing and apply thinly with a roller use a small brush to paint in between the lines. Don’t apply too much paint or you will loose the definition of the faux Beadboard joins.
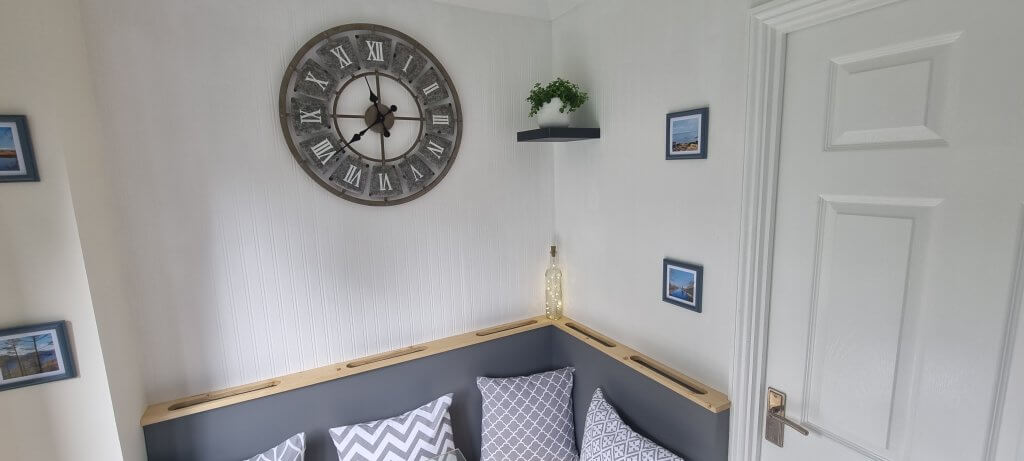
When the paints dry it’s time to get stuck into the fun bit of dressing your new walls. I went for a small floating shelf in dark gray to match the rest of the kitchen and placed a shiny small leafed low maintenance peperomia rotundifolia that would eventually trail down over the shelf.
I placed an oversized rustic metal roman numeral wall clock on the largest wall and then finished off the small wall with some coastal images in gray frames to match the floating shelf.
That’s all that it took to get a little piece of the US east coast in to your house without breaking the bank. If you’re about to embark on a similar project why don’t you post some before and afters below.