Driveway Problem
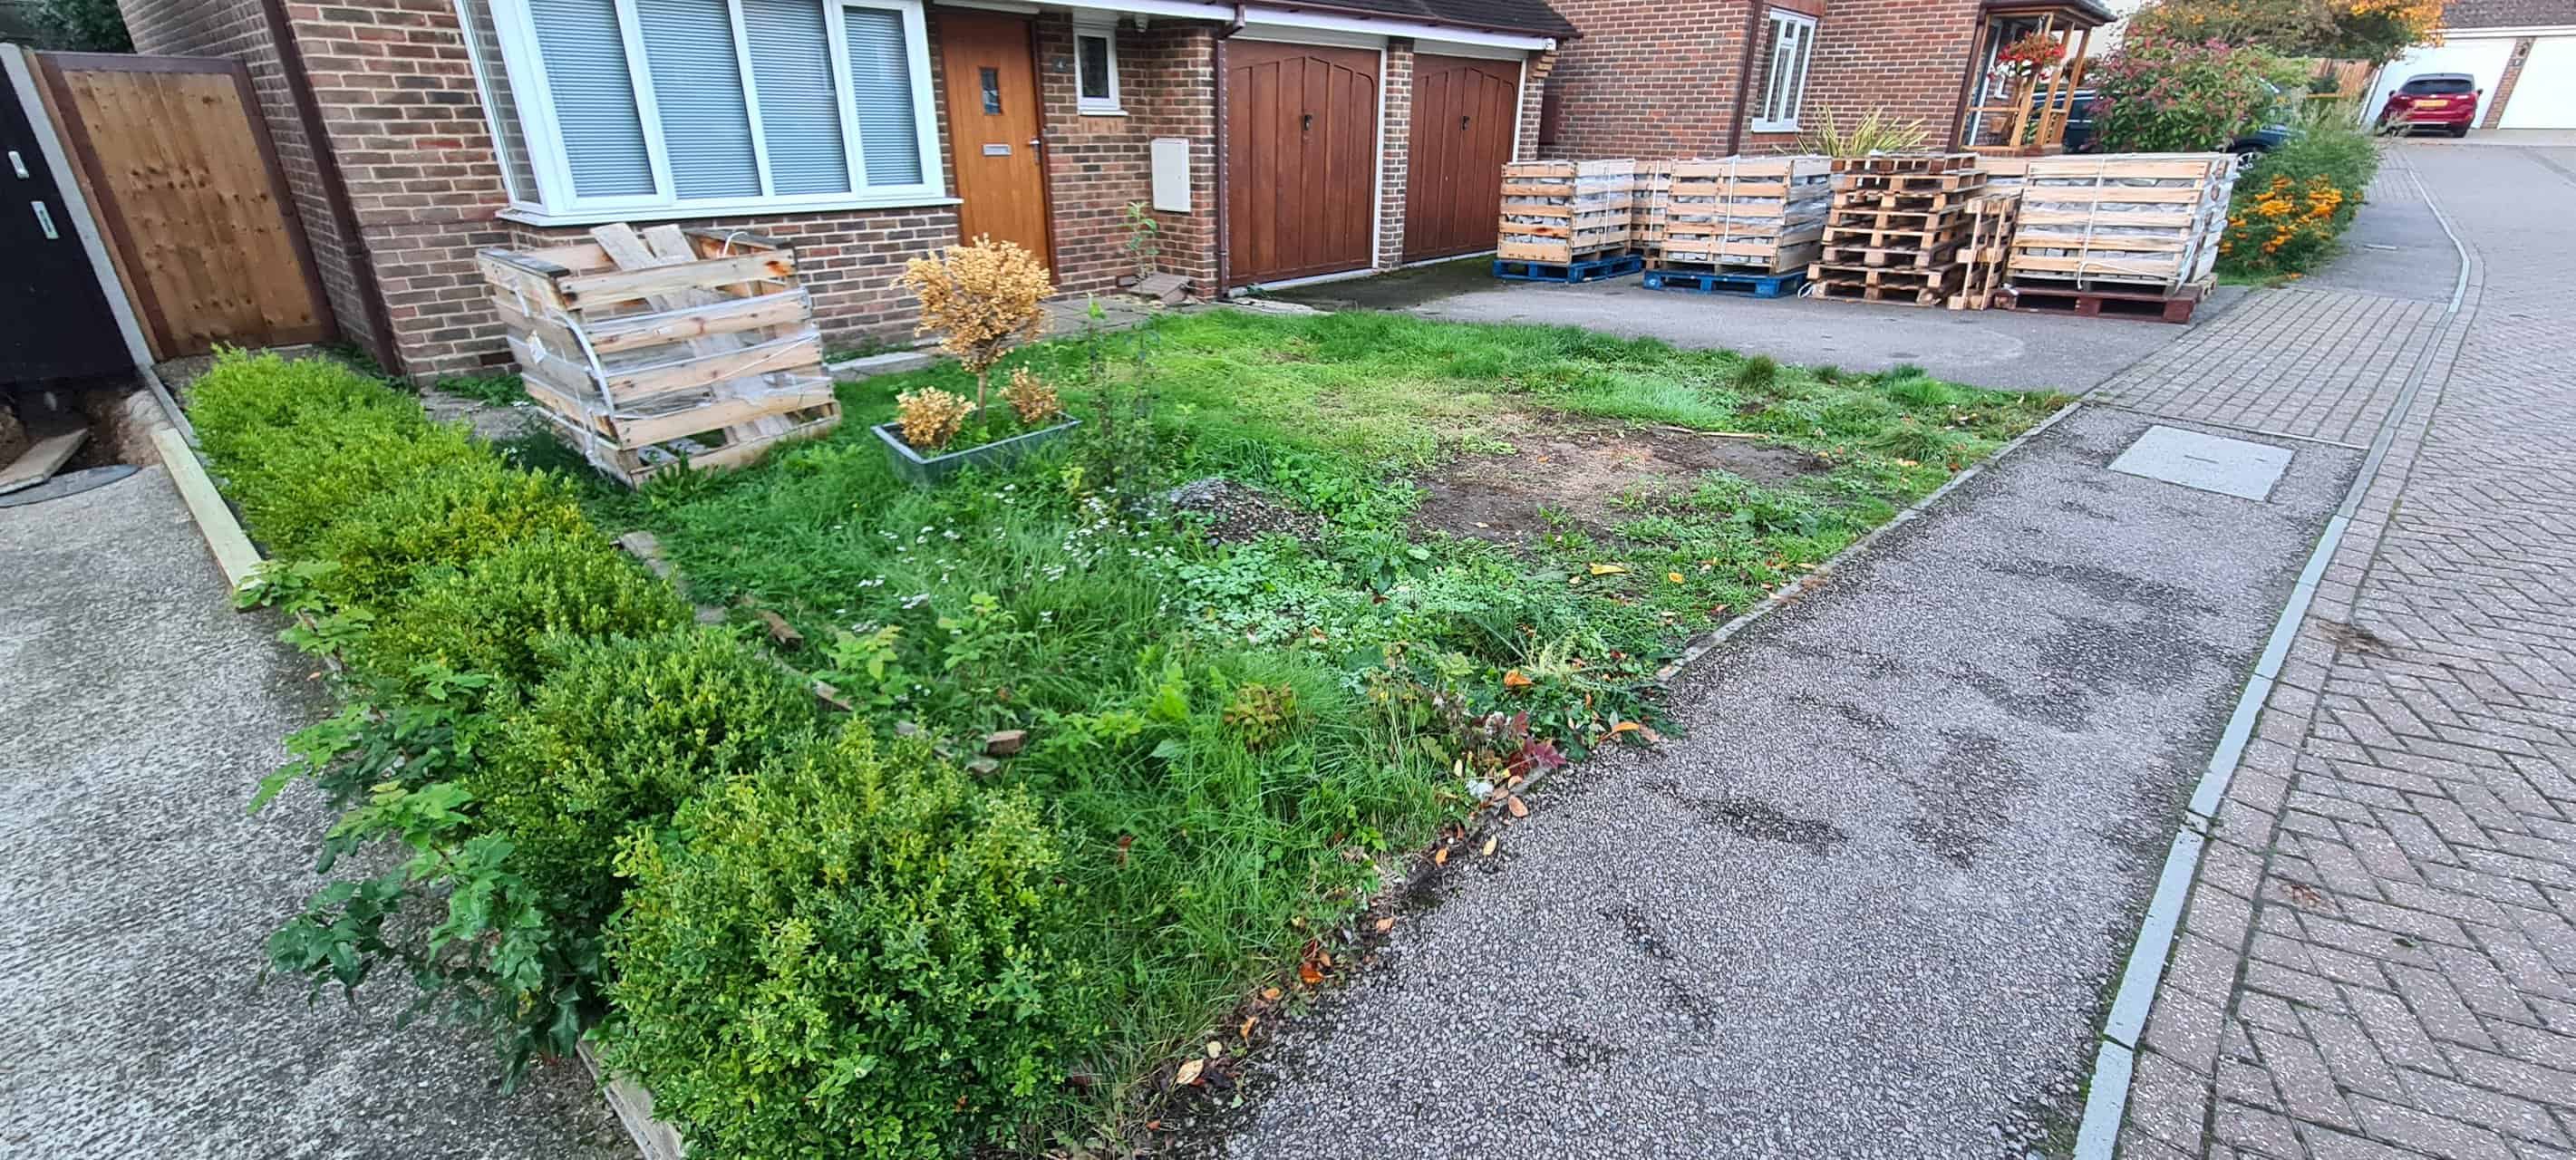
A tarmacked north facing drive, especially with a thin skim of old asphalt that slopes towards the house, is always going to be a maintenance headache. Moss from the roof gets dropped onto the blacktop followed by rain which never really evaporates making an ideal haven for moss and algae to thrive turning the driveway into a slippery and sludgy goo. Overtime this concoction eats away at the asphalt until it becomes just a muddy bog.
Driveway Solution
In our case the answer was to replace the tarmacadam and the garden area with granite setts laid on a sand and cement base and infill with a structural grout that would prevent any weeds or moss from growing through or taking hold. This construction would also be easy to jetwash making the just laid appearance of the cobles easy to maintain on an ongoing basis.
Certificate of Lawful Development
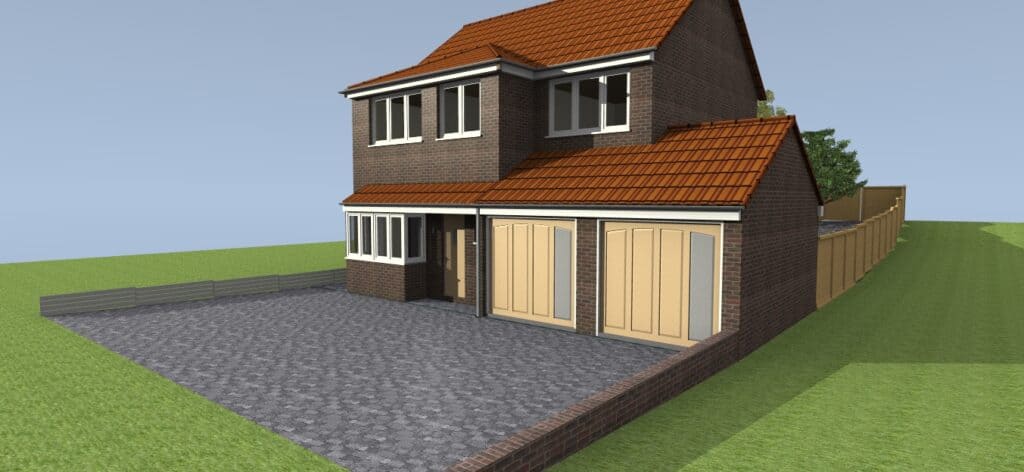
With the driveway being quite a large area over five square metres I did not want to take a chance with it falling foul of building regulations so I submitted an application for a Certificate of Lawful Development. Technically with the slope of the drive running down towards the property and none of the rainwater runoff flowing off the property it did not require planning or building control approval.
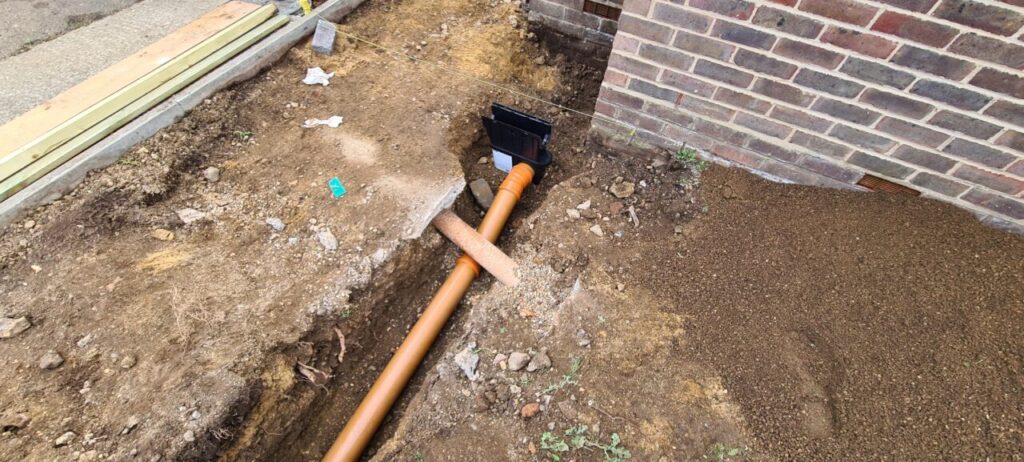
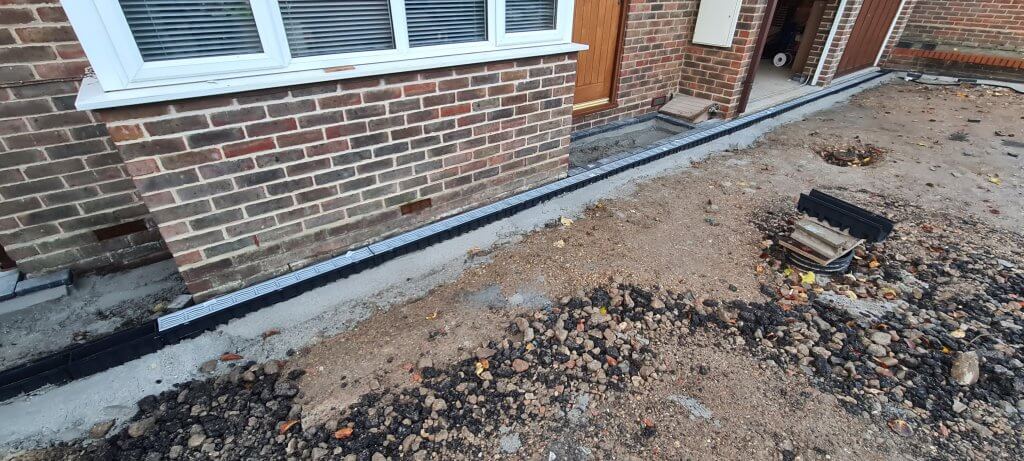
Because there would be no absorption of the rainwater through the cobble stones a need will exist to install a soakaway fed from a channel drain running across the lowest part of the drive.
I drew up plans and did some 3D drawings to support the request for a Certificate of Lawful Development and submitted the application which was duly ratified and issued by East Herts Distract Council.
Material Selection and Acquisition
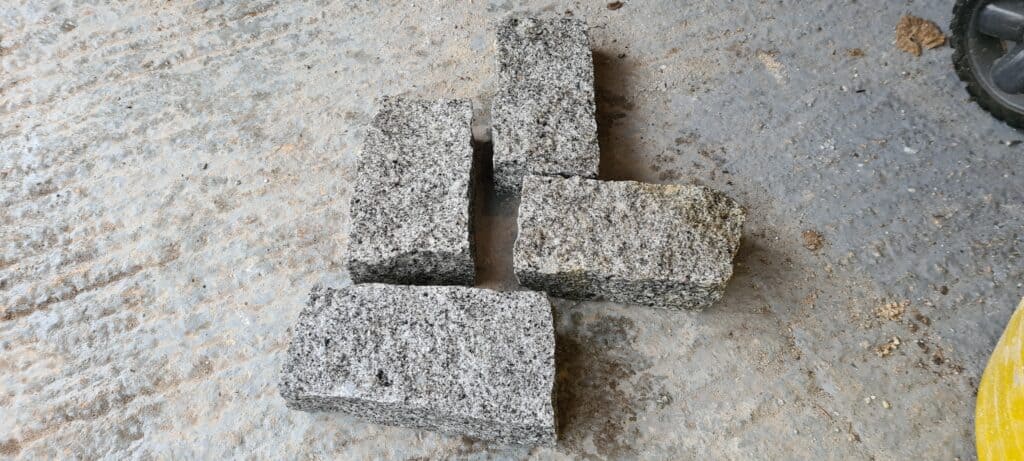
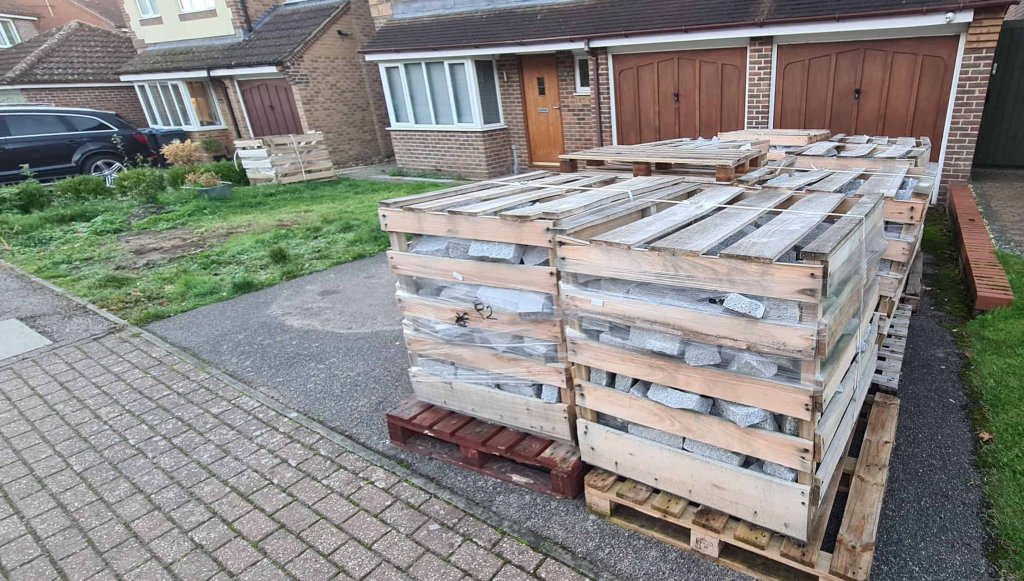
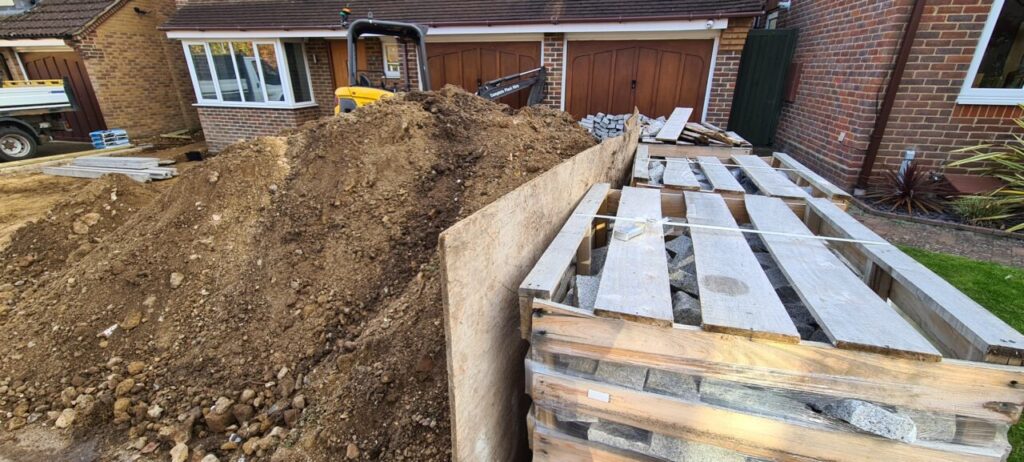
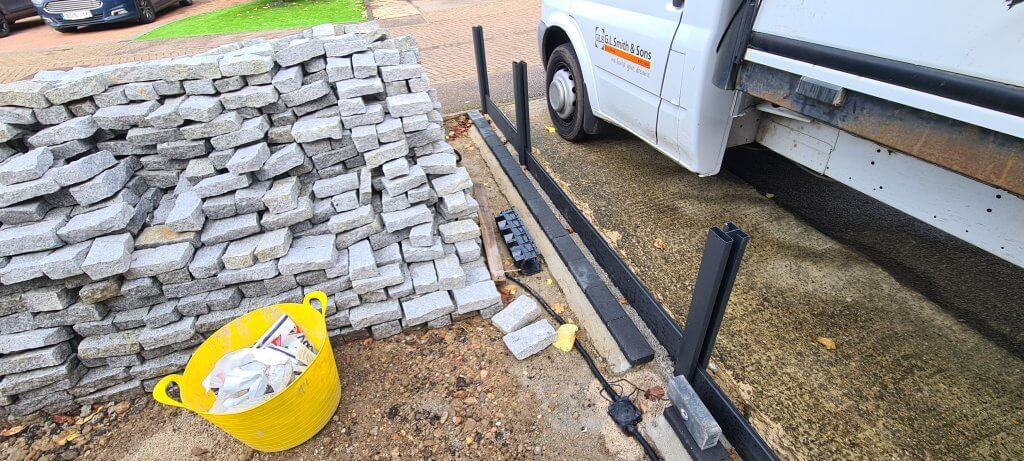
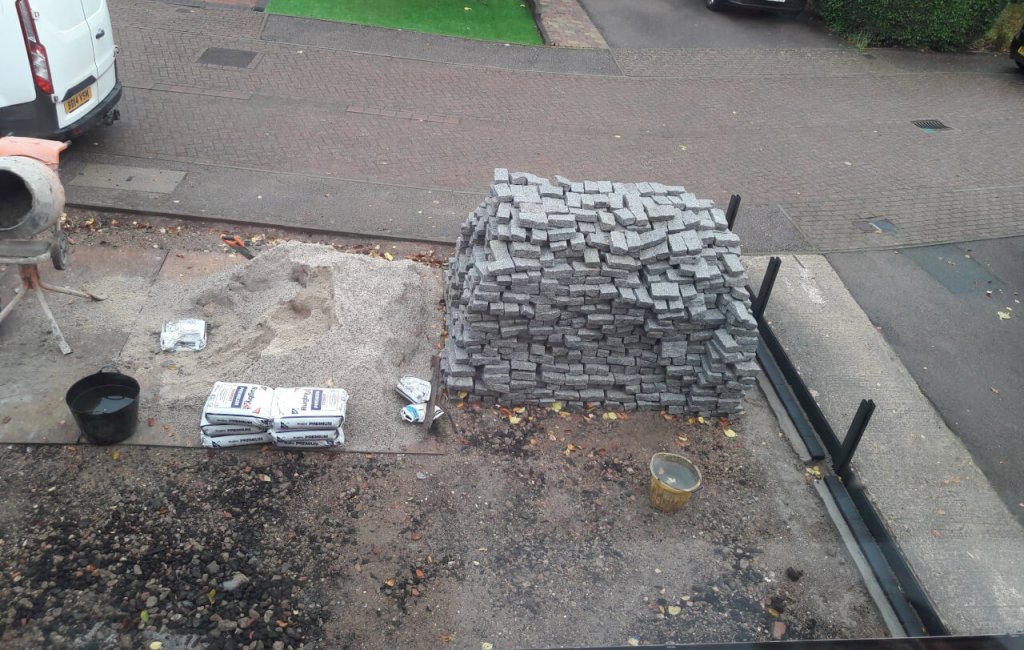
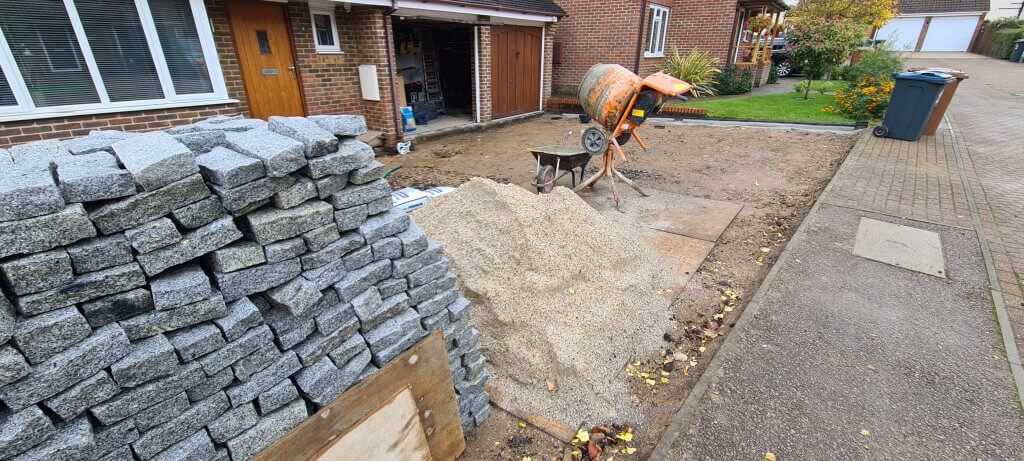
I picked an untumbled granite cobblestone sett which would be grouted with Larsen Gunnable Pointing Mortar. Ten tonnes of the setts were ordered and delivered along with thirty-five 25kg bags of the Larsen GPM. A dark grey engineered paviour was chosen as a border brick and 250 of these were purchased.
9 low voltage drive over ground lights and driver were purchased along with 9 Wiska junction boxes and Raytech gel boxes plus 50 metres of UV stable flexible outside cable. To protect the cable running underground I purchased 50 metres of flexible conduit and screw in connectors. Armoured cable, glands, weather proof box and an external weather proof socket were also purchased.
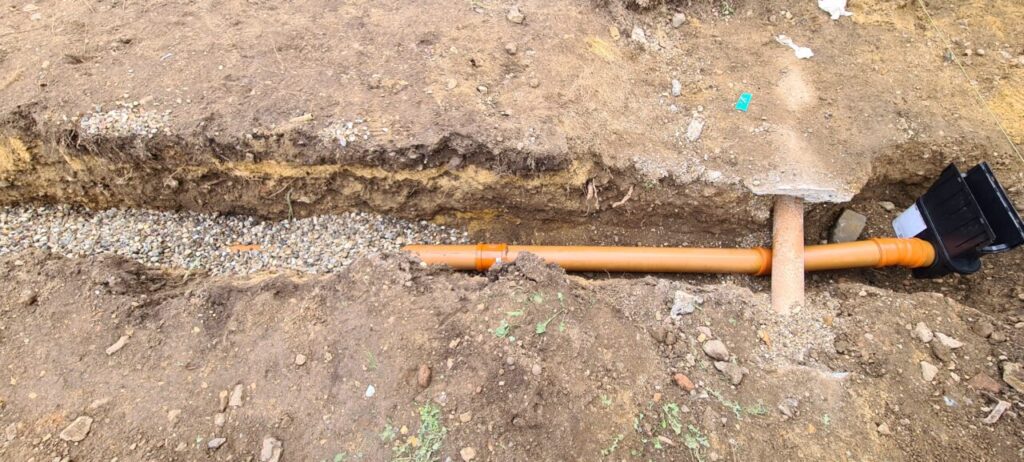
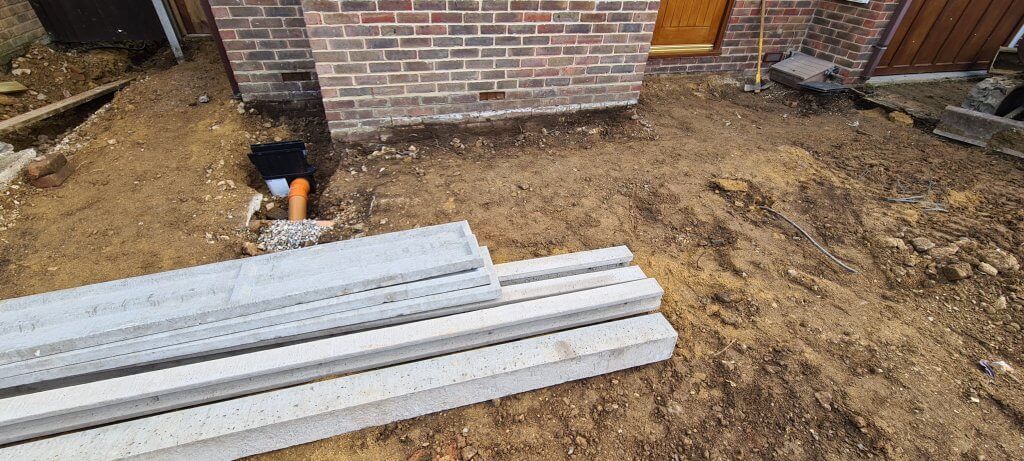
A flat-packed 1.5m2 soakaway was ordered along with 12 metres of channel drain including a sump to allow the prevention of detritus from getting into the soakaway. I also ordered 110mm pipe, enough to run from the sump to the soakaway along with double sockets, 15, 30 and 45 degree bends to cater for the fall that would be required to put on the pipe from the sump to the soakaway.
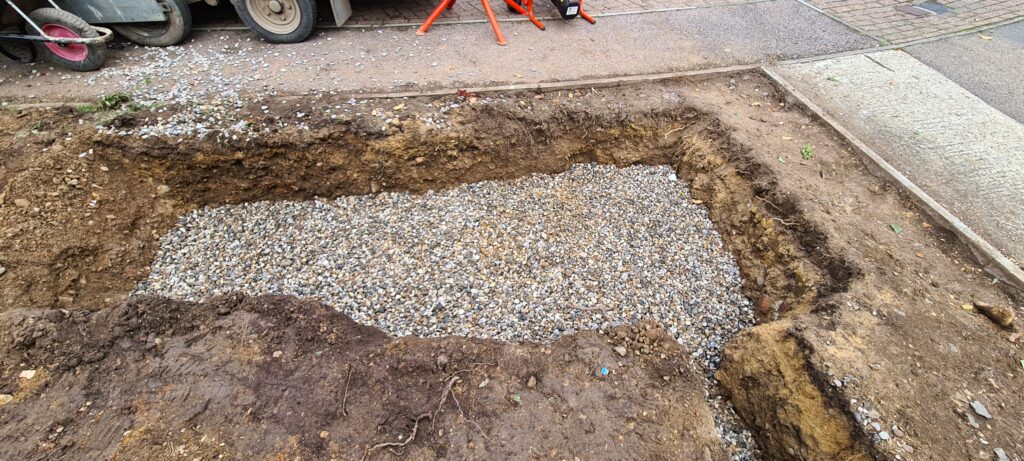
6 tones of Ministry of Transport Type One subbase was delivered along with 8 tonnes of sand and 16 bags of cement.
The cobblestone setts were delivered in one tonne crates a few weeks before work was due to begin so we handballed three of the crates round to the back of the house to create as much room on the drive as possible. I knew that we would be moving the setts around the drive on an ongoing basis during the works as required.
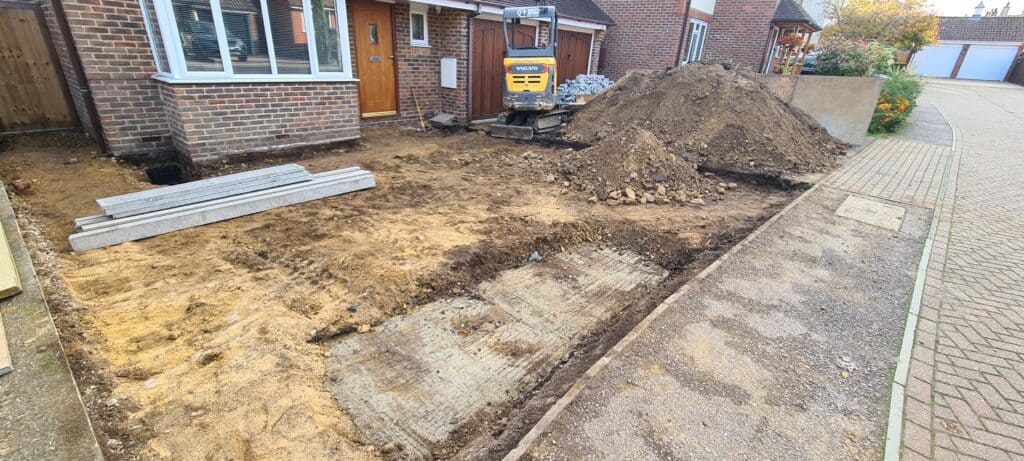
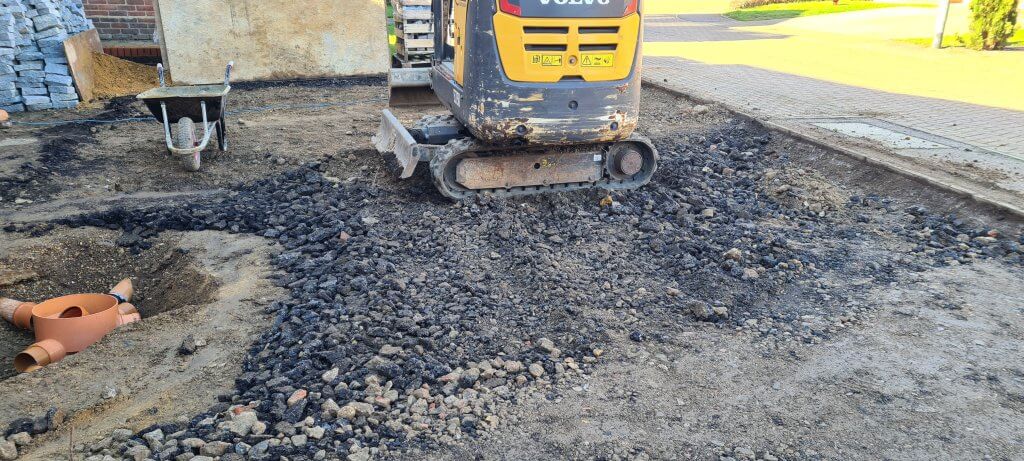
Ground Breaking Day
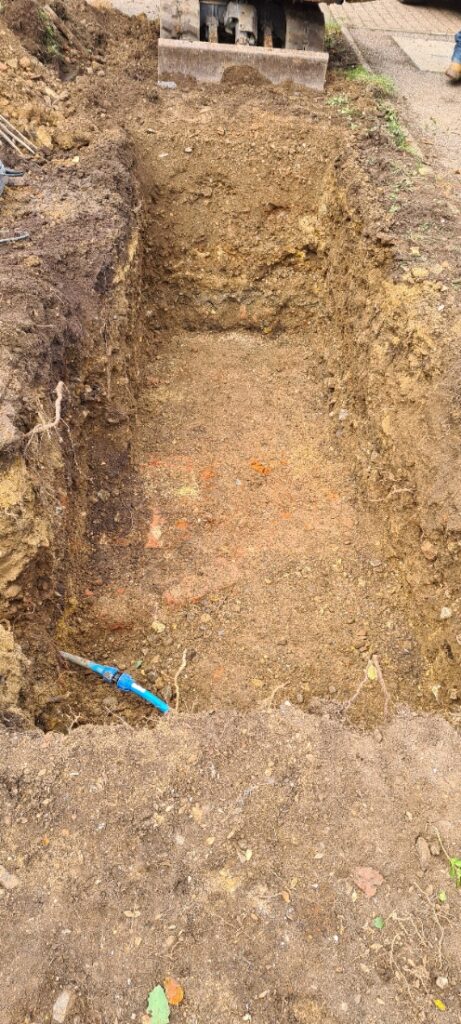
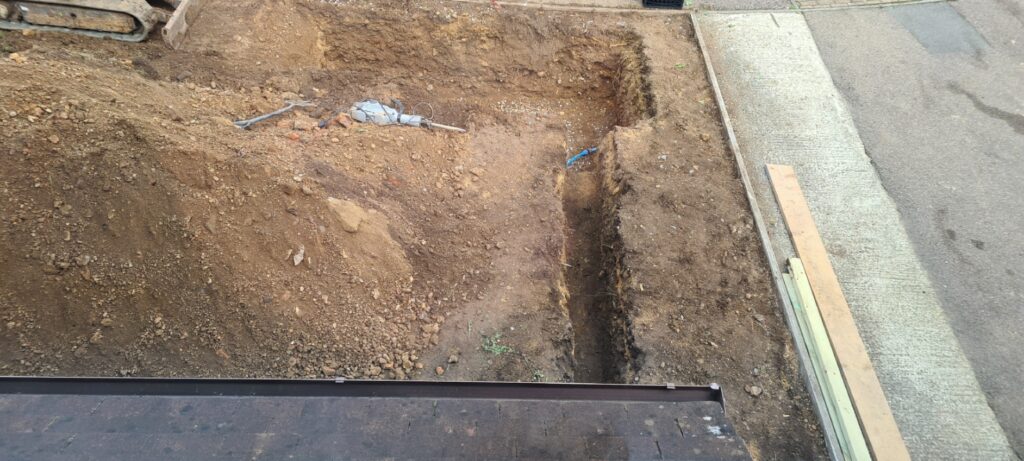
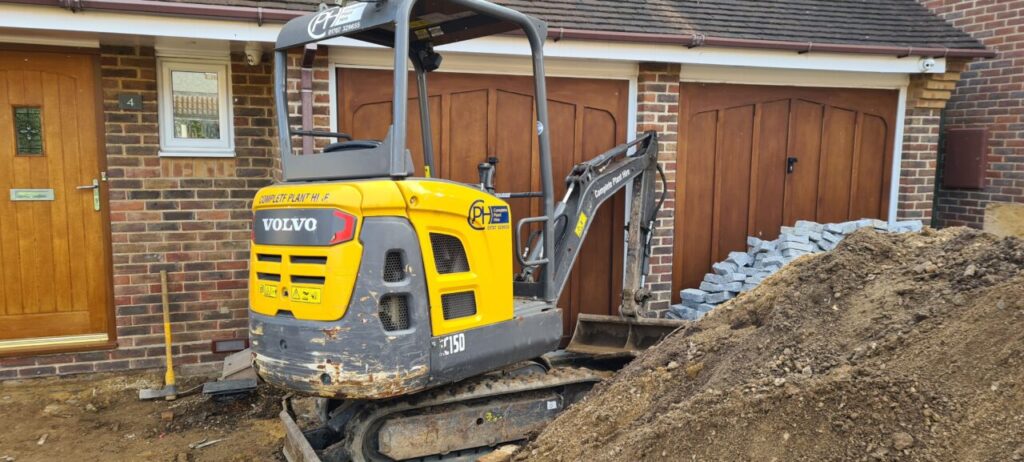
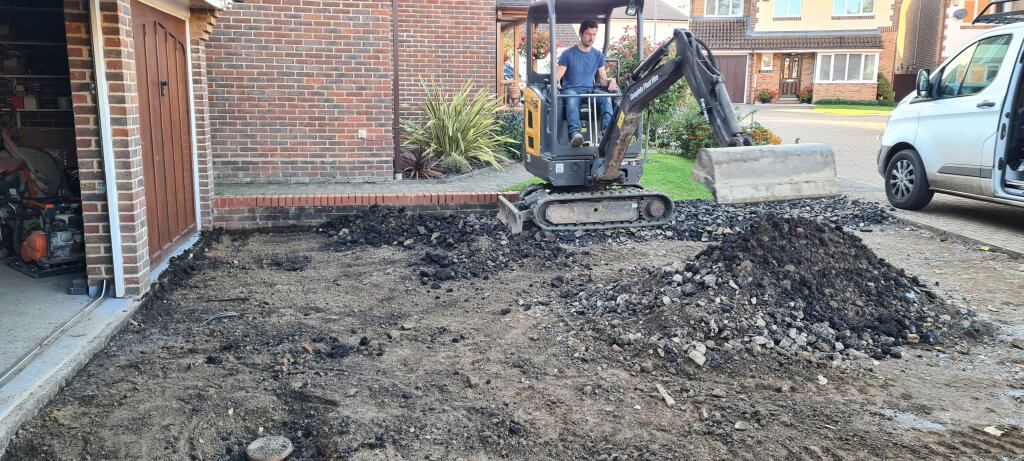
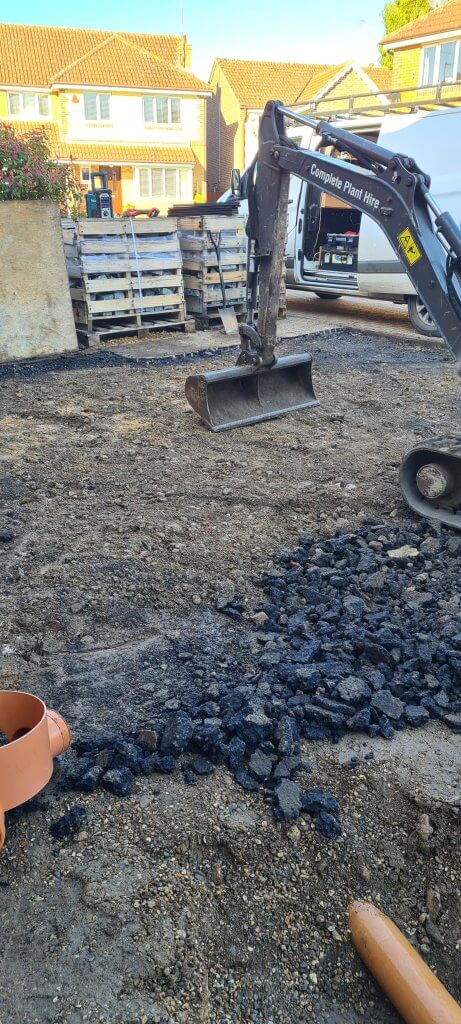
With all the materials in place the day arrived when we were to start work. The first job was to pull up the existing patio slabs and bushes that bordered the boundary fence. Main contractor Mark Winfield of M Winfield Building Services took delivery of the hired mini excavator. Using the mini digger Mark started to drag top-soil off the site in order to start getting down towards the eventual depth required to lay down the MoT Type 1 and sand and cement mix plus the cobble.
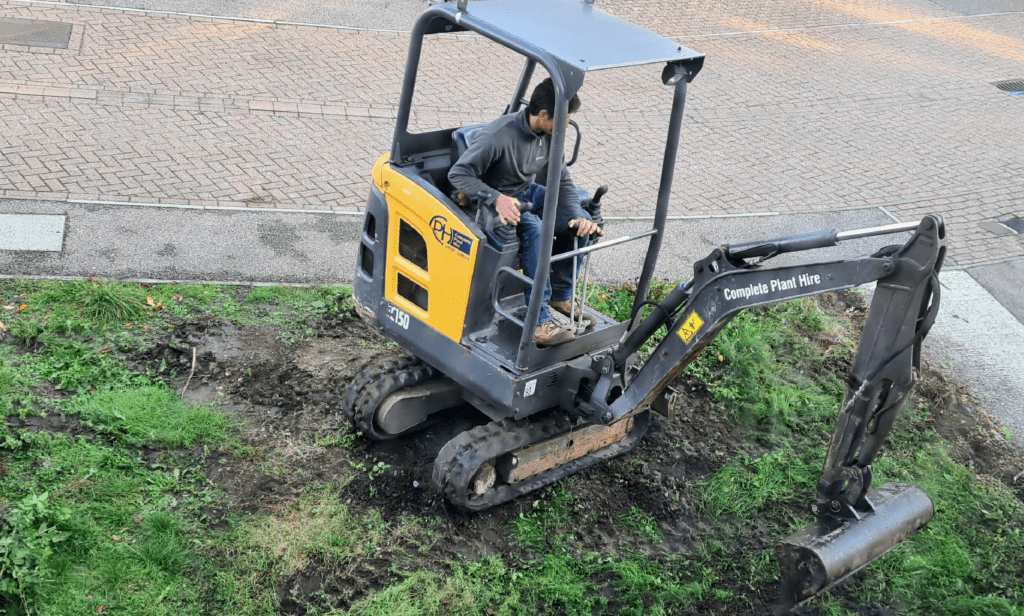
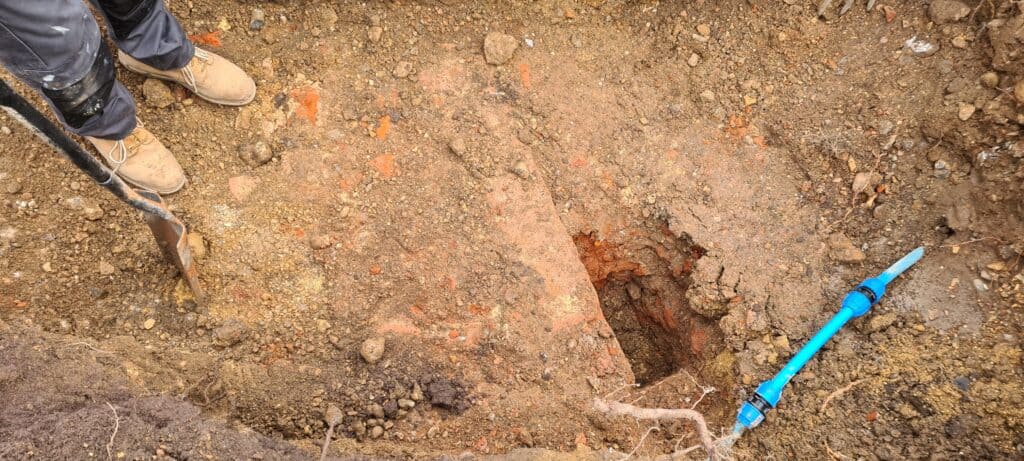
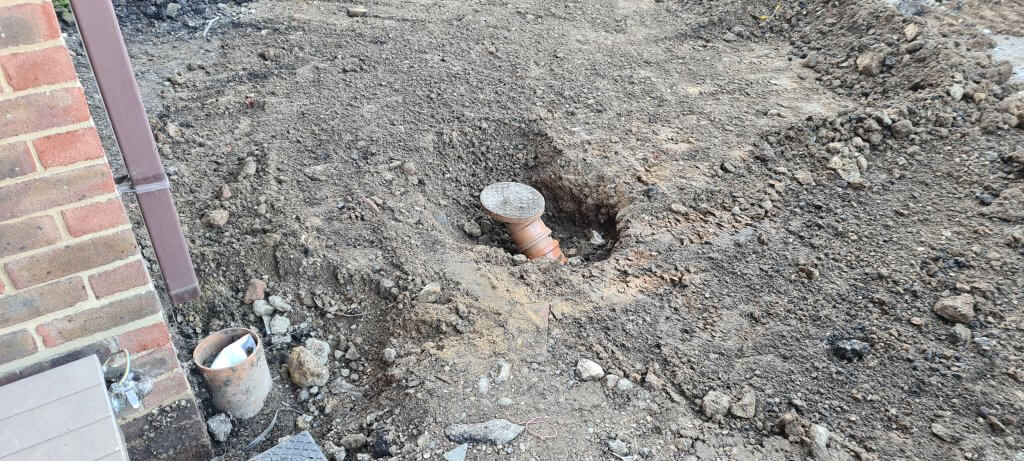
Breakers and Jackhammers were used to bust out sporadic occurrences of concrete buried in the subbase. The digger was used to dig a trench in the required position from next to the bay window to the position of the soakaway. Then the position of the soakaway was marked out and dug out with the mini digger. Unfortunately we hit the foundations of the old cinema that was there on the site before the houses were built so we had to make the soakaway pit horizontal instead of vertical.

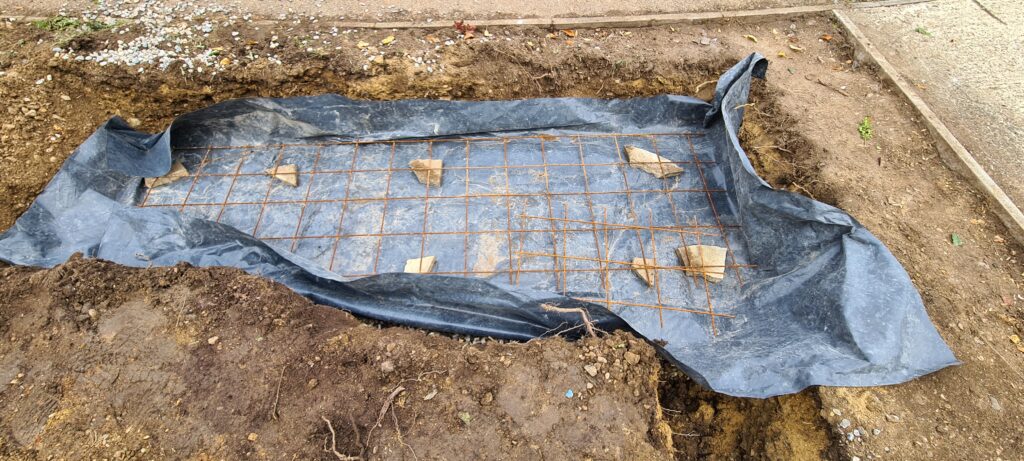
Soakaway Installation
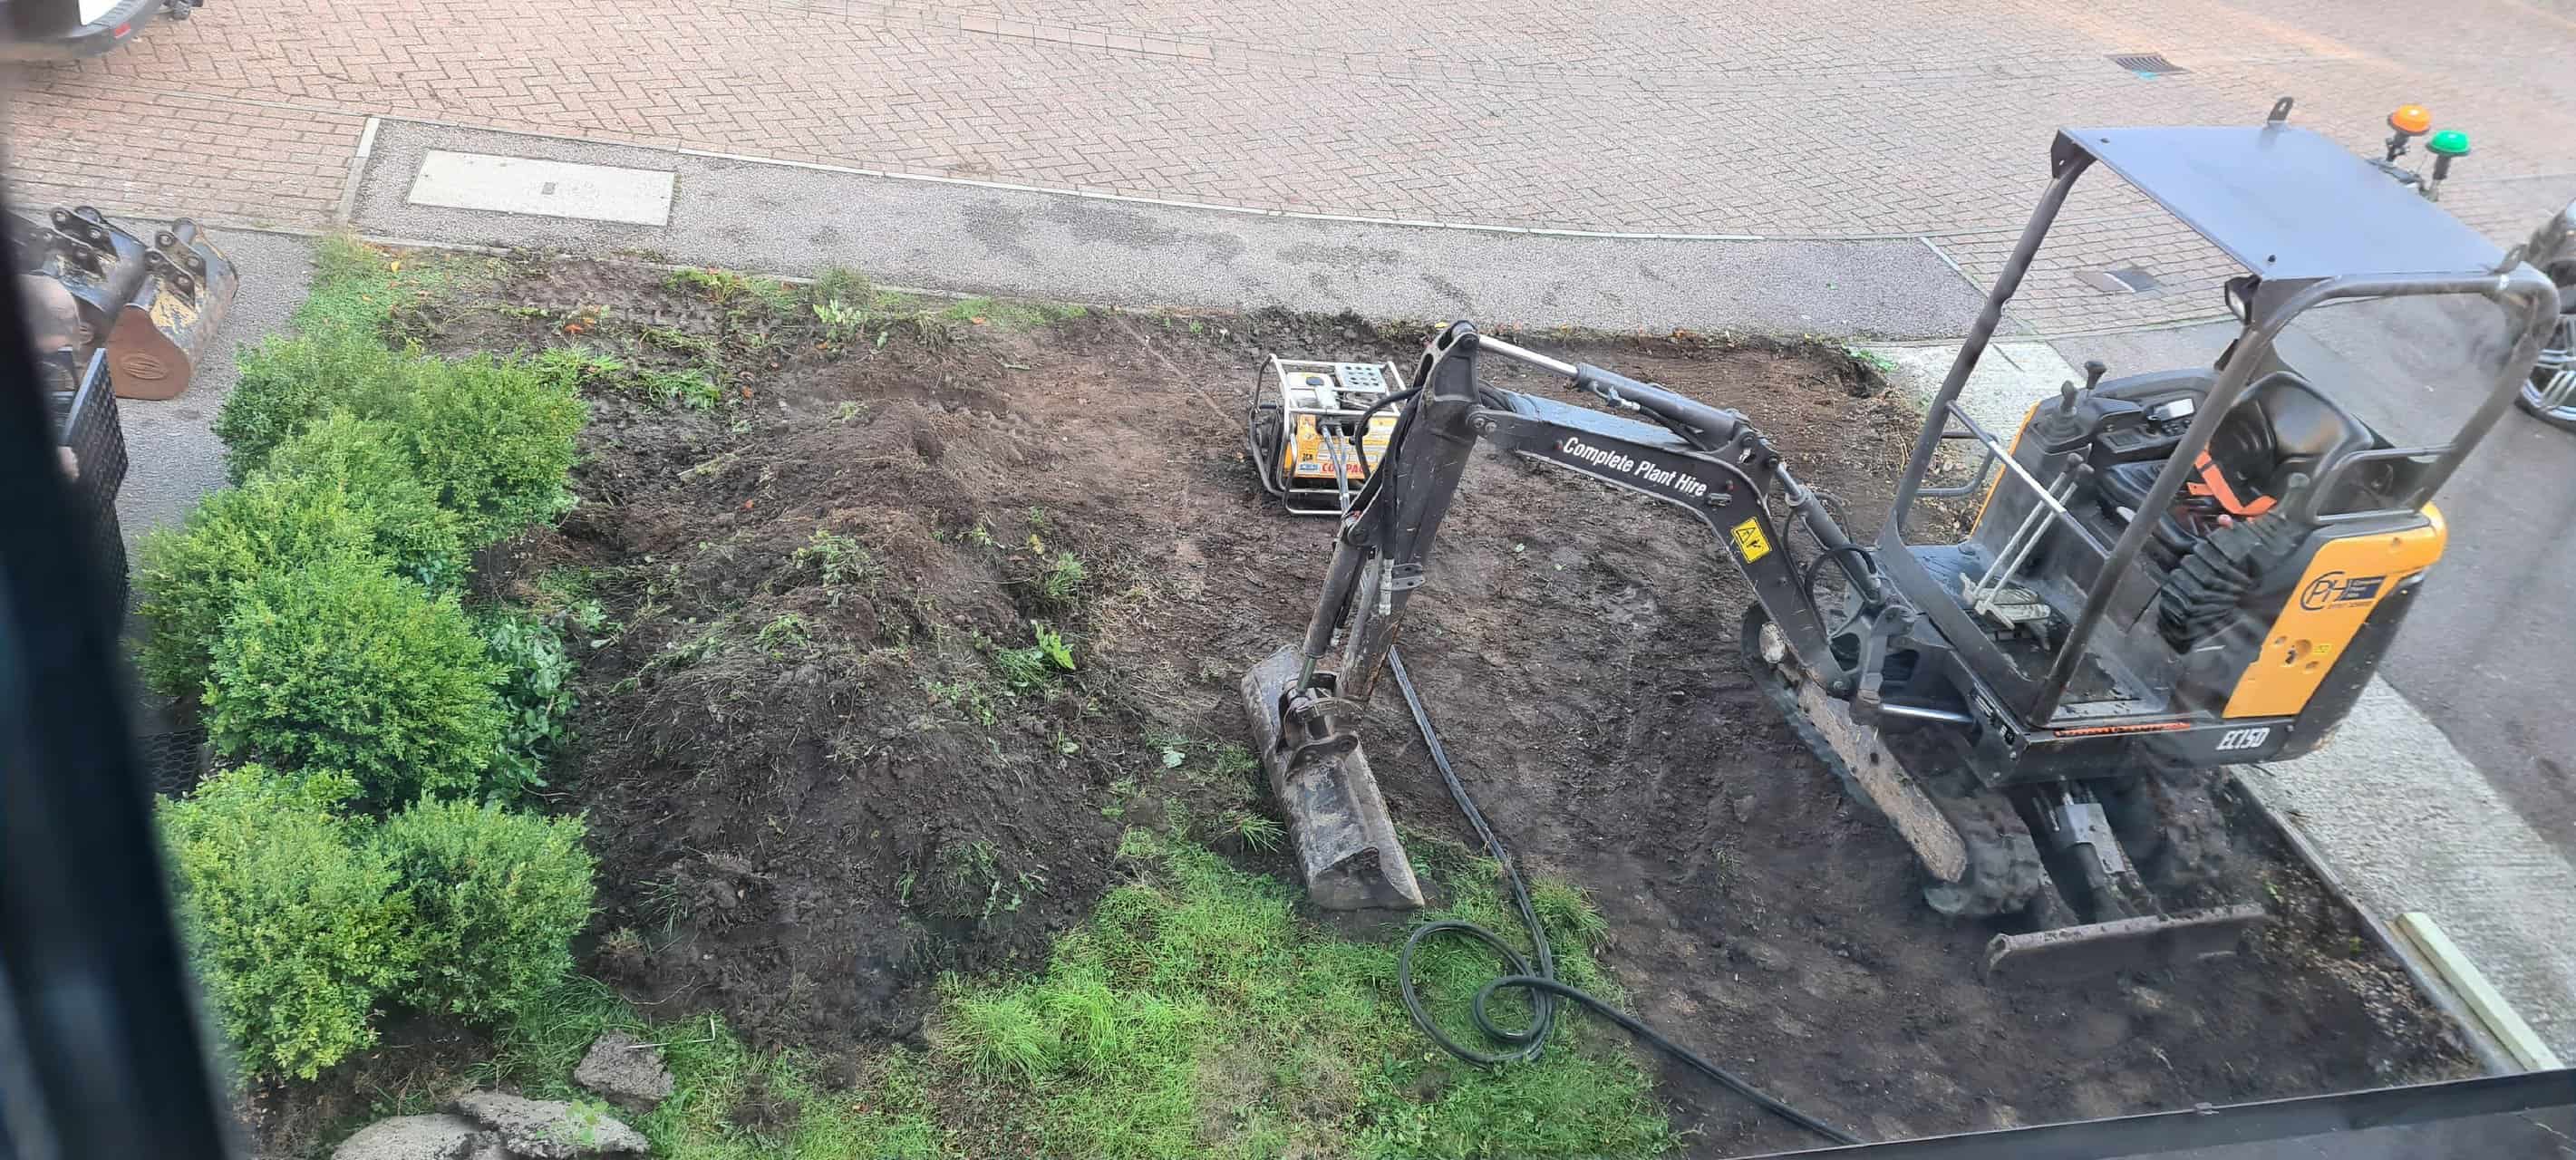
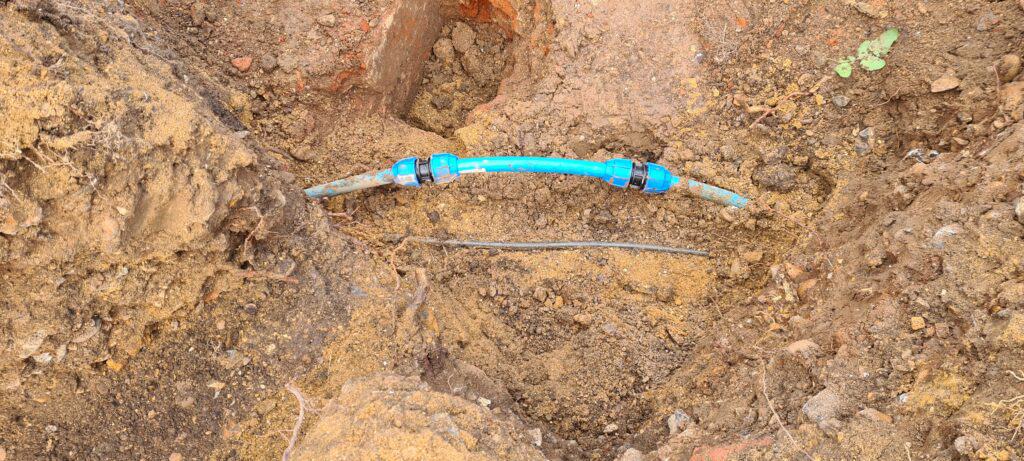
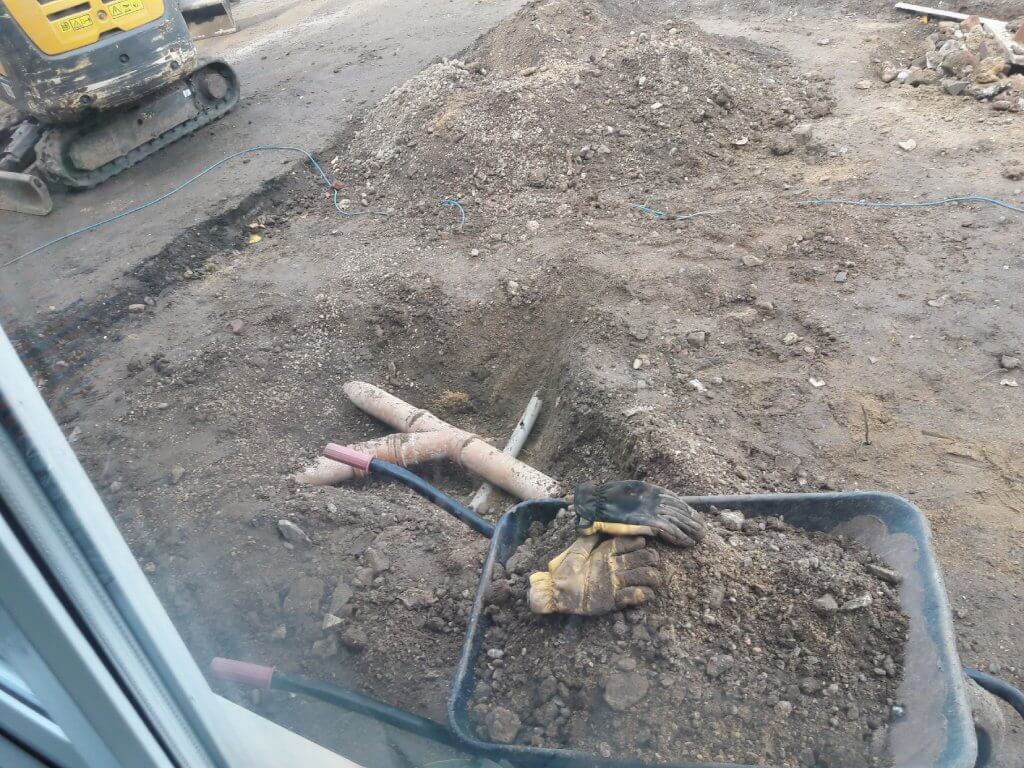
While digging the soakaway pit we came across the water main which had been run diagonally across the garden and with no warning tape or sand and shingle back fill to give us a hint about the position of the water main. The bucket of the digger went through the main and I had to make good with a new piece of blue pipe and connectors.
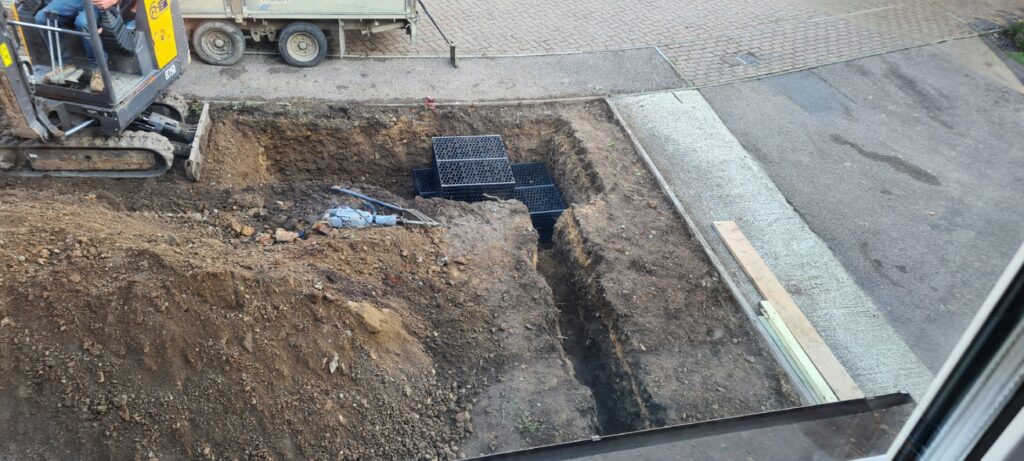
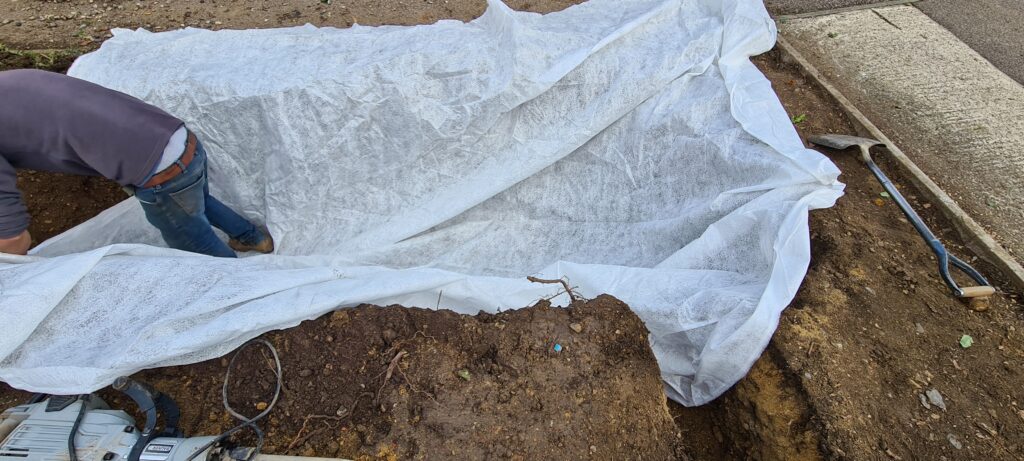
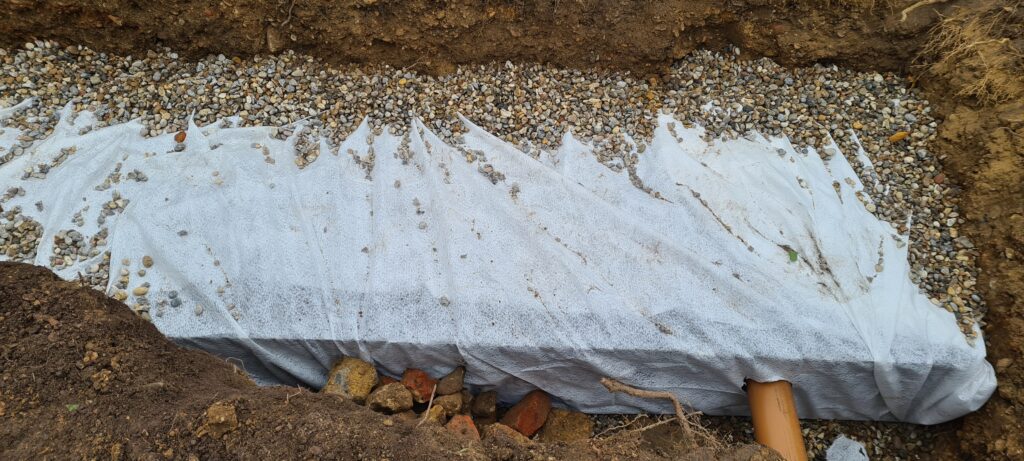
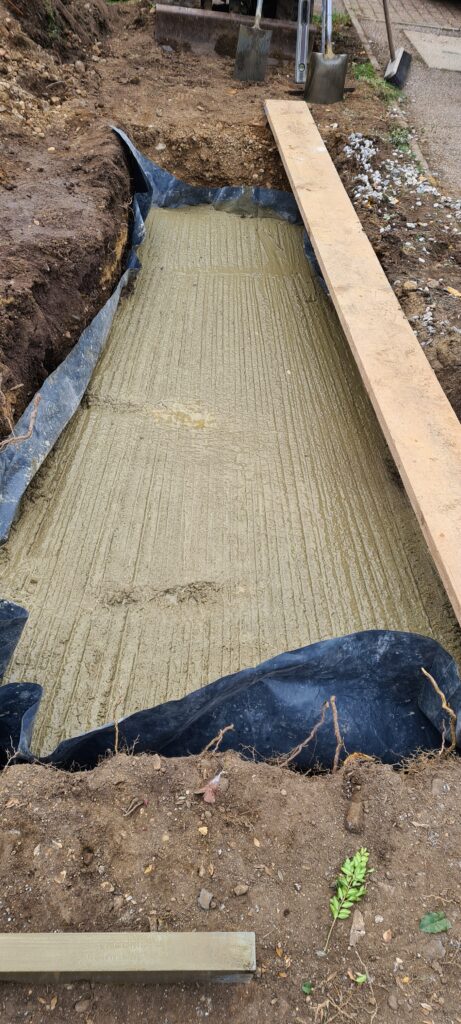
Once the pit was dug we infilled with shingle and then made up the soakaway creates and installed with membrane or terram. The 110mm pipe was then installed with the correct fall and fitted to the channel drain sump. Then we backfilled the soakaway pit with sand and shingle and covered with concrete.
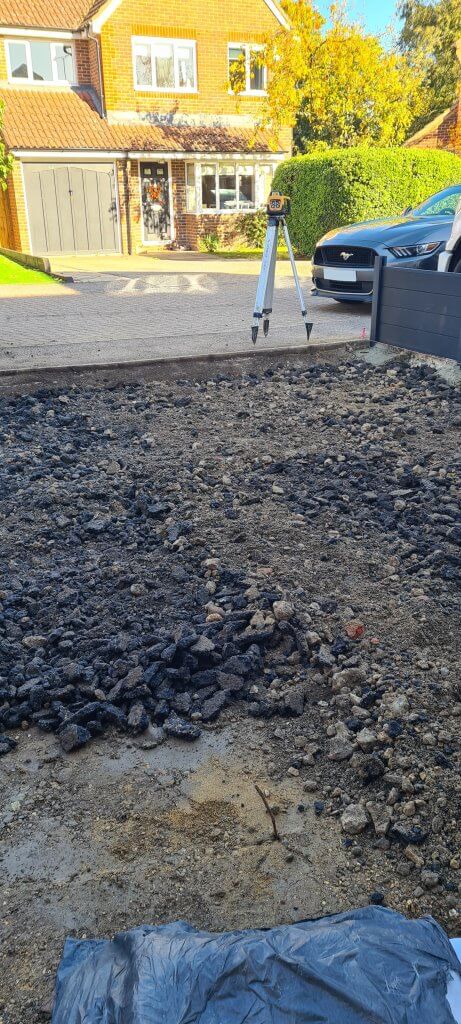
Earth Moving and Site Levelling
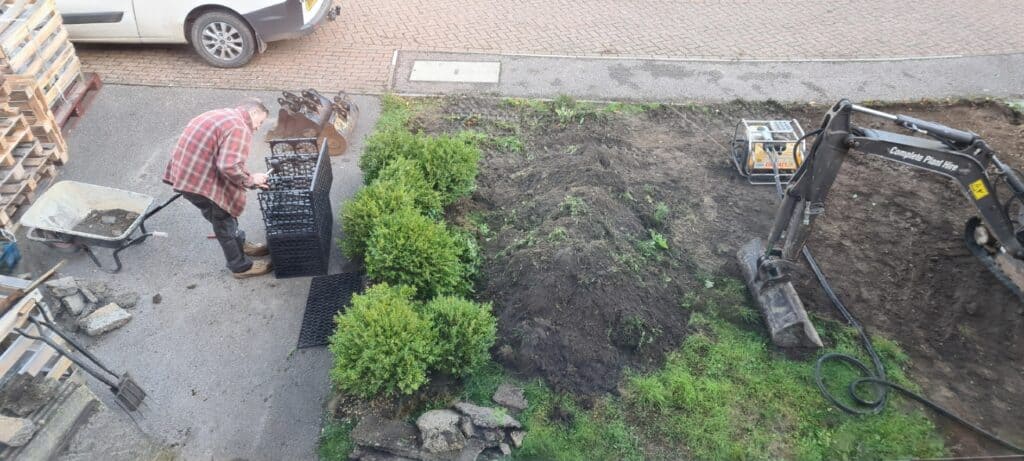
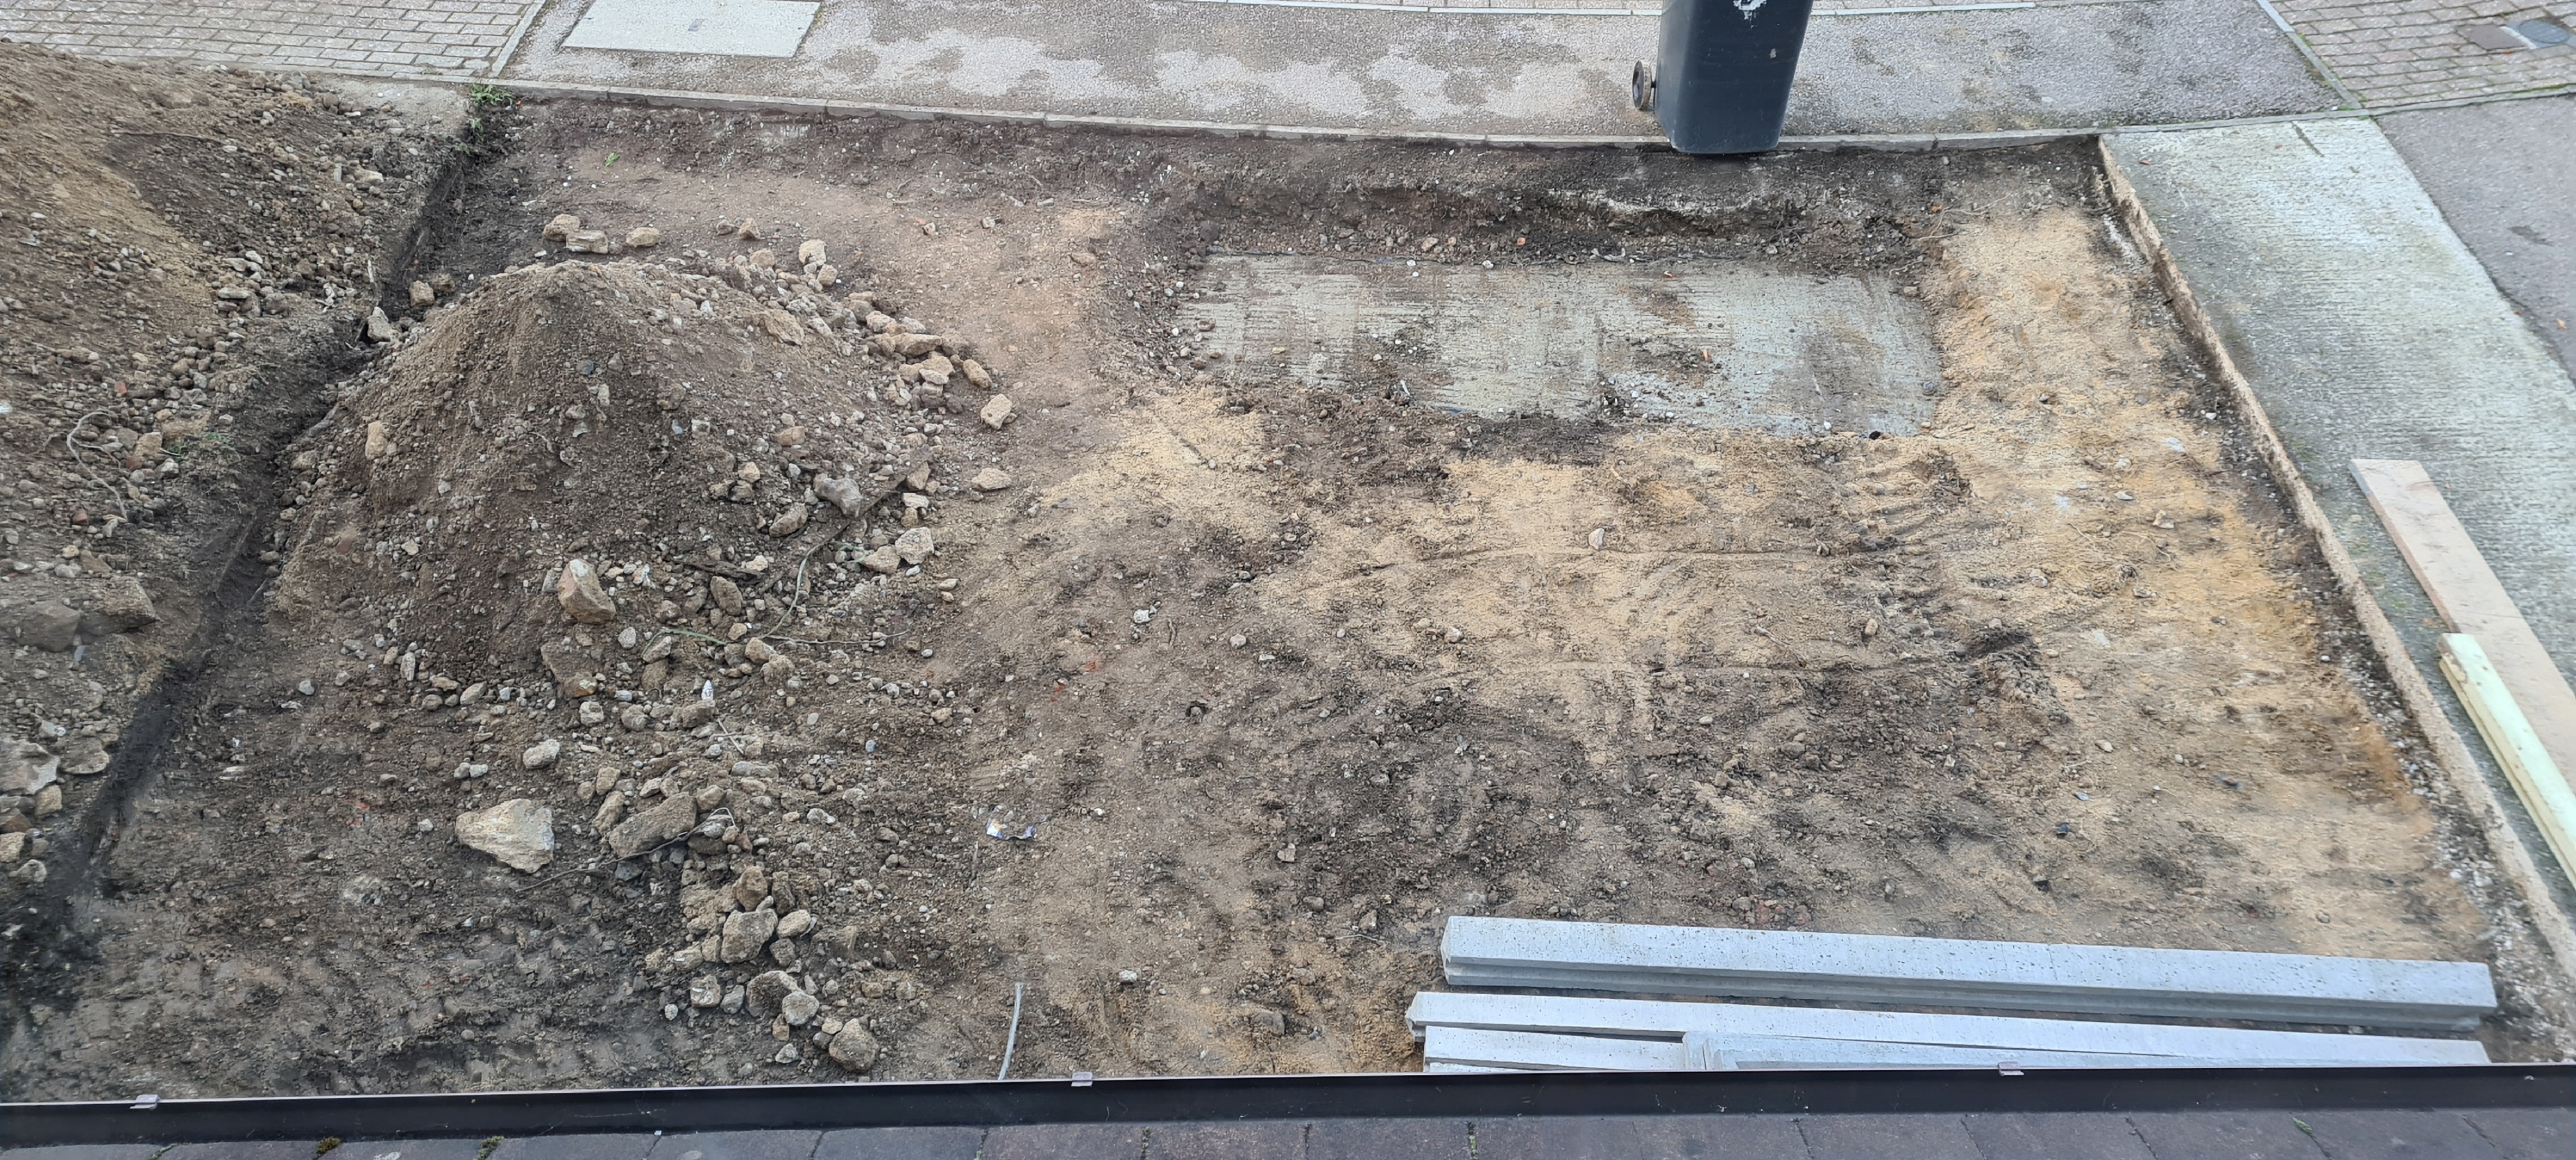
Now the soakaway was installed and concreted in the process of pulling a level with a string line and grading the site continued. This started by moving the mound of spoil already accumulated in one position to another pile over on the driveway. We also handballed the cobble setts in the crates on the drive out of the crates and into a pile in one place and got rid of the crates.
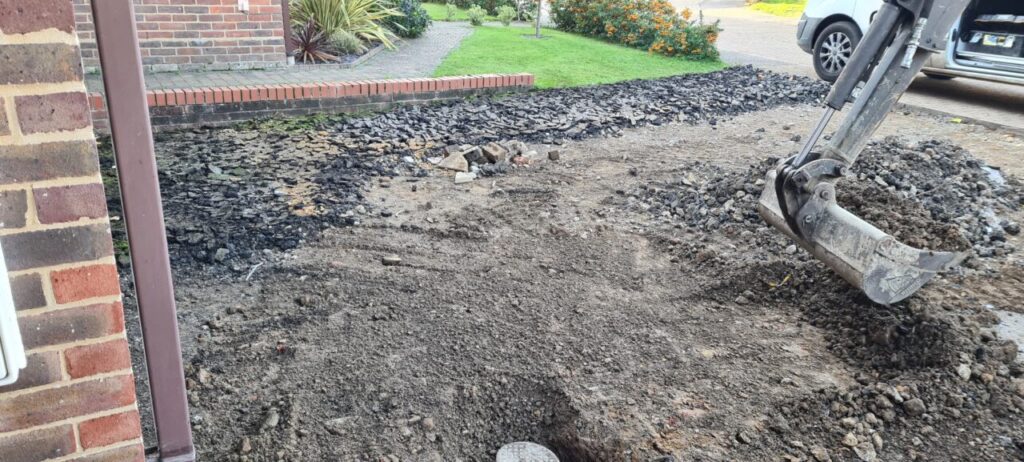
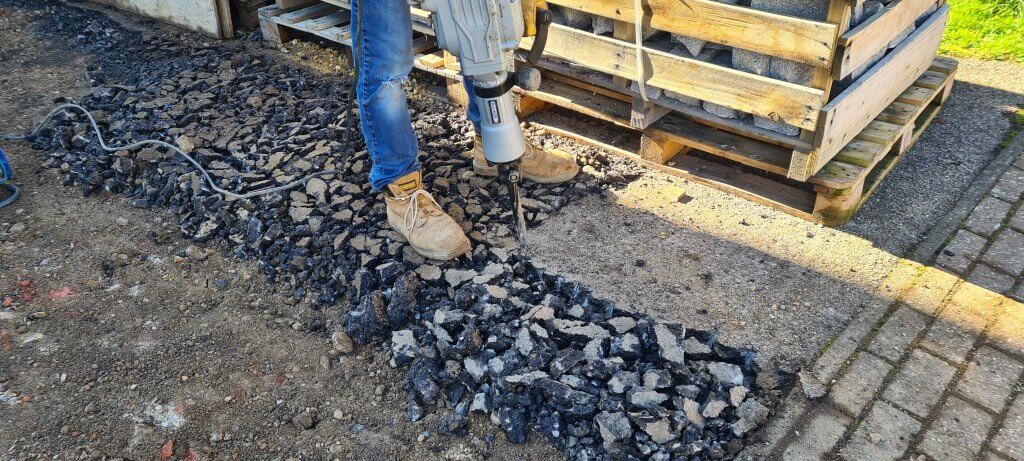
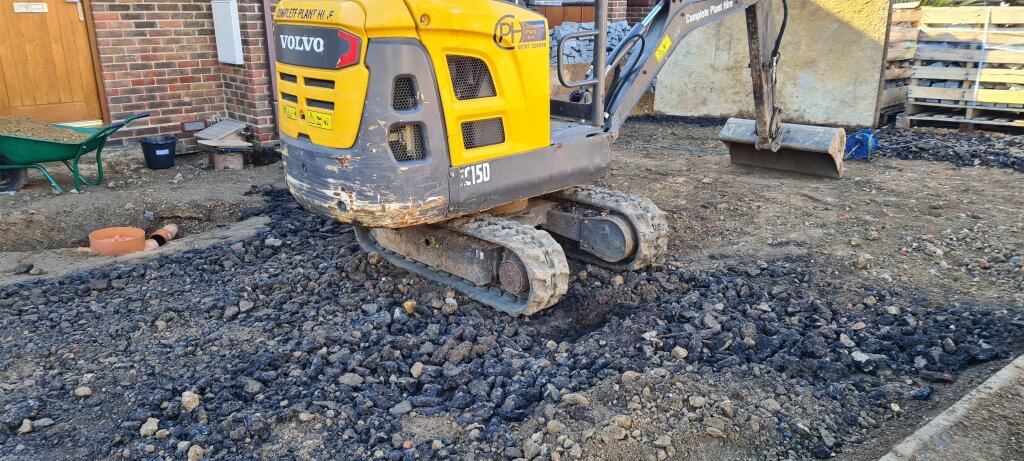
With half of the old tarmac drive clear the next job was break up the old tarmac driveway. With two of us on Jackhammers this took us just over one day. The tarmac that was not full of mud and moss was put to one side in a pile ready to be mixed with the MoT type 1 as part of the subbase to be spread across the site. This did involve moving the cobbles again to gain access to the last part of the old drive.
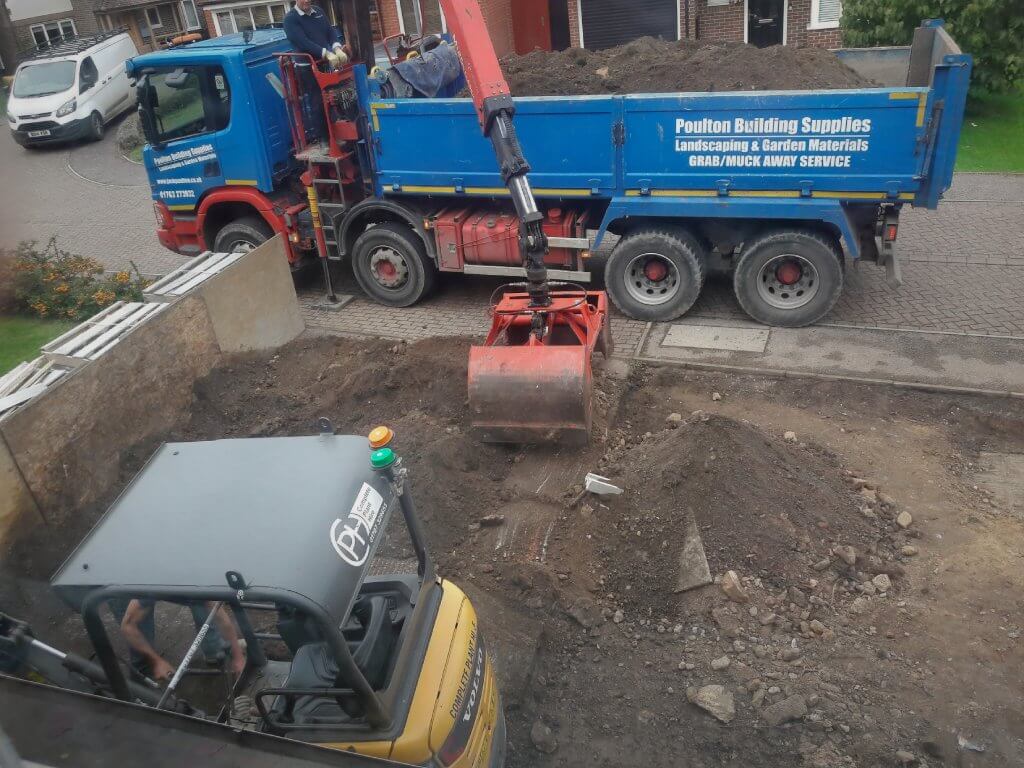
At this point we had a large pile of spoil in the middle of the site so we organised a Muck Away service to bring a grab lorry and scoop up the spoil and take it away. This left us with just the pile of cobblestones ready to be laid and a pile of tarmac chippings which would be used as crush to mix in with the MoT Type 1.
Posts and Panels
Up to this point in the project all the work had been at ground level but now we needed to erect a six foot closeboard fence part way up the drive and then a 600mm grey composite slatted fence to the end of the drive. Part of the neighbours old concrete drive was broken up to accommodate the fence posts which were cemented in using fast setting postcrete and then the panels were slid into place.

Chambers and Channel Drains
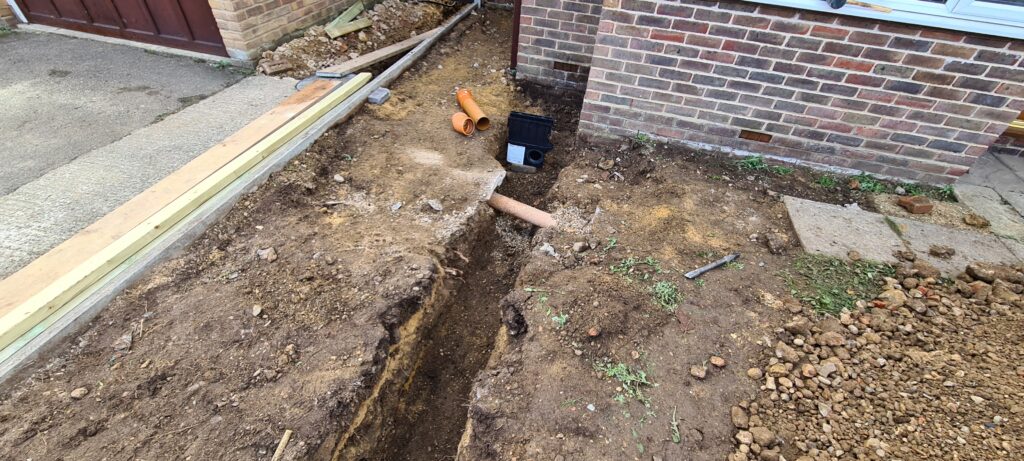
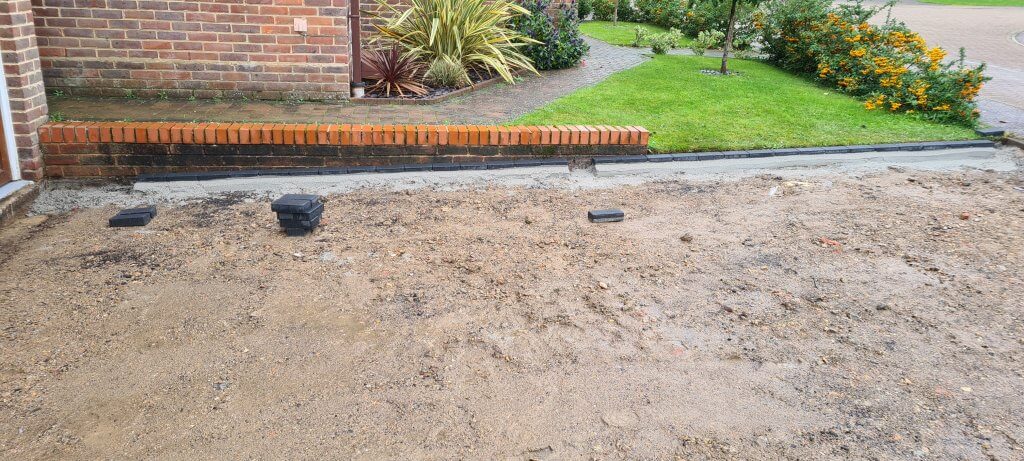
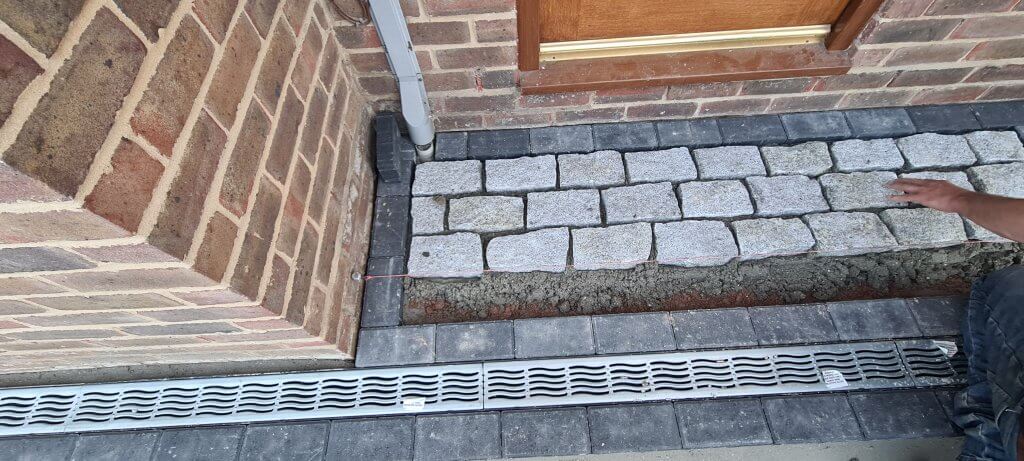
Just outside the front door and right in the path proposed for the channel drain lay an inspection chamber that serviced the downstairs WC. It had been installed with a plastic cover and fixed in position at a jaunty angle so the only option was to remove the existing chamber and install a new one where the 110mm pipe went into the main sewer line. The new chamber was installed with a flexible rubber connection connector and a 15 degree bend. A riser was installed ready to accept the 300mm block paver recessed frame and tray.
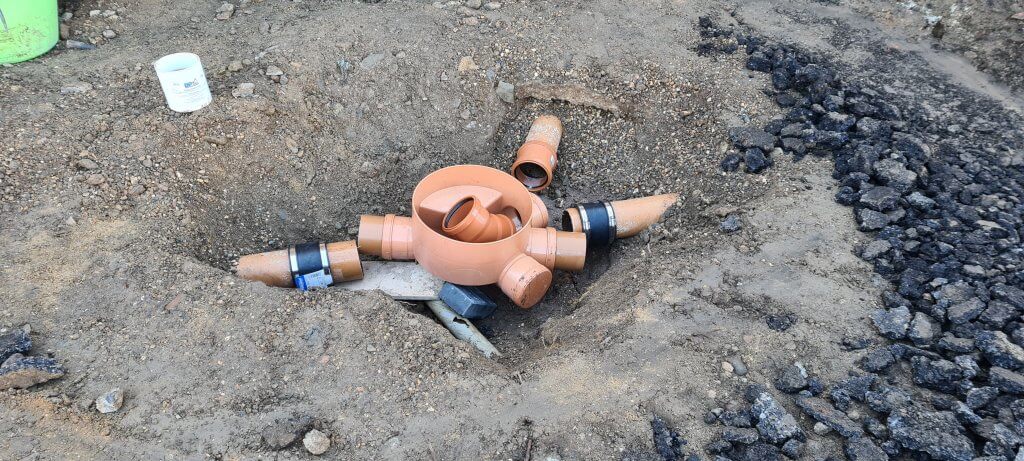
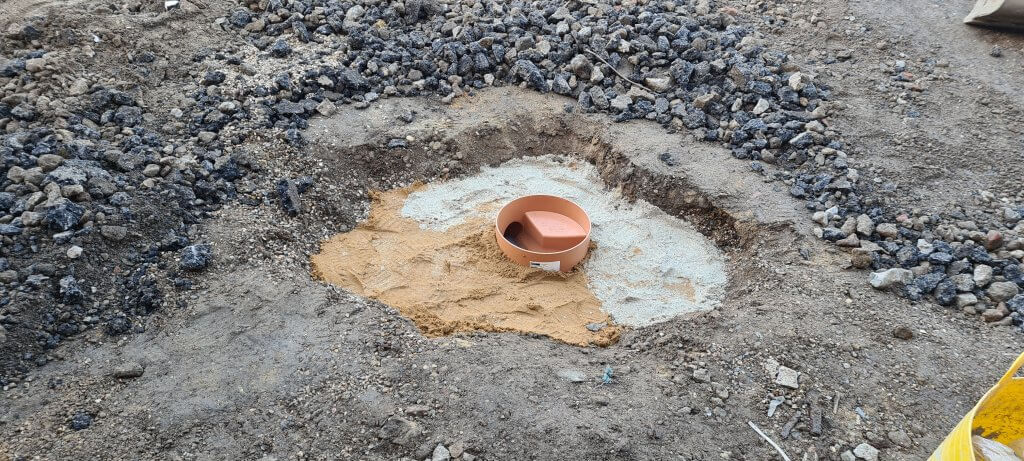
Also needing adjustment was the oval rodding eye access cover which required lowering so that similar to the inspection chamber mentioned earlier a 300mm block paver recessed frame and tray could be installed above it.
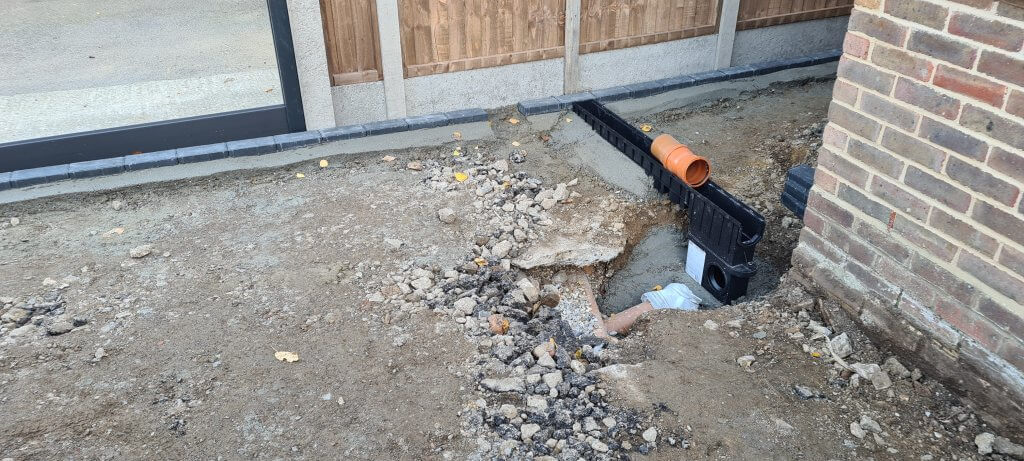
The next job on the list was to install the channel drains. A string line was run a long the path of the channel drain at the correct height and he channel drain bodies were clipped together and cemented in position. A hole was created in the channel drain to run into the existing storm drain outlet for the left hand side of the drive and the sump for the right hand side of the drive was connected into the channel drain run as previously positioned.
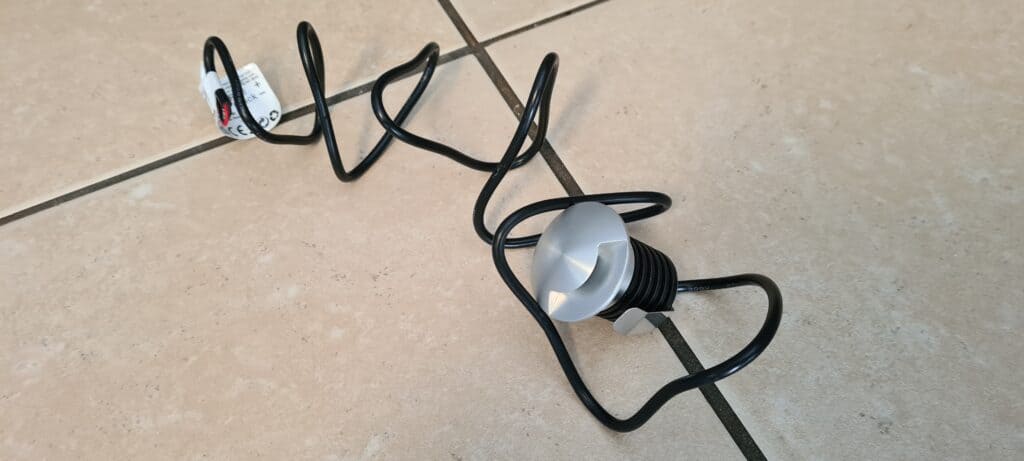
Drive Over Lights
Bordering the entire drive there was going to be a dark grey engineered paviour that would also have the drive over lights set in it. So we drilled out nine of the bricks to house the lights with a diamond core bit and drill pouring plenty of water over the drill bit to aid the grinding process.
An armoured cable was run from a fused spurt in the garage to a weatherproof fused socket and then a short extension lead was then run into a weather proof socket box still inside the garage. A plug was connected to the LED light driver which was housed in a junction box and then an external flexible cable was run from the drive into conduit. The conduit was run through a hole in the garage peer and then out onto the drive. Each light had a Gel box and a Wiska box connected to the conduit by a screw in conduit box connector with the light connected inside the Gel box.
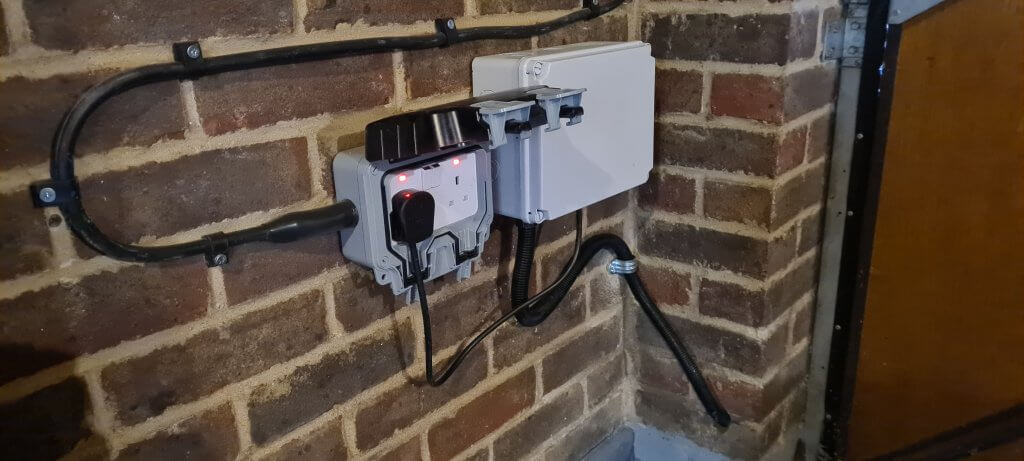
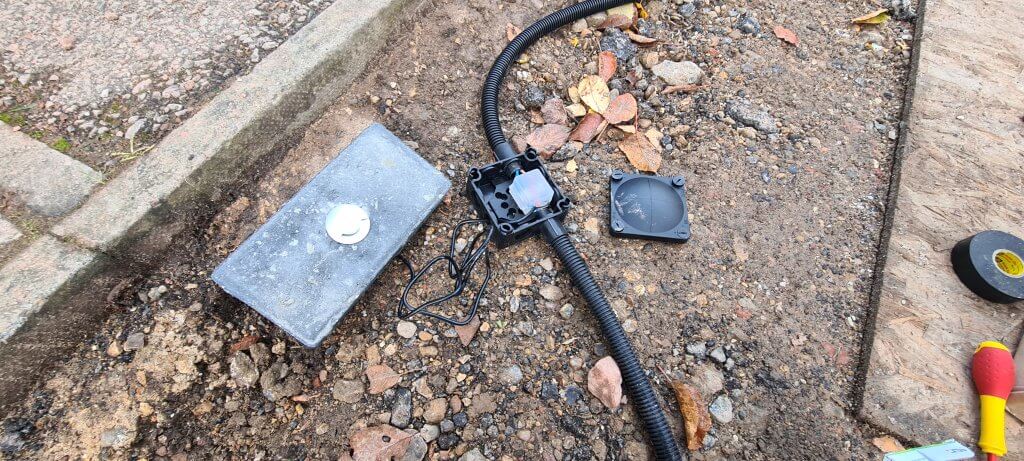
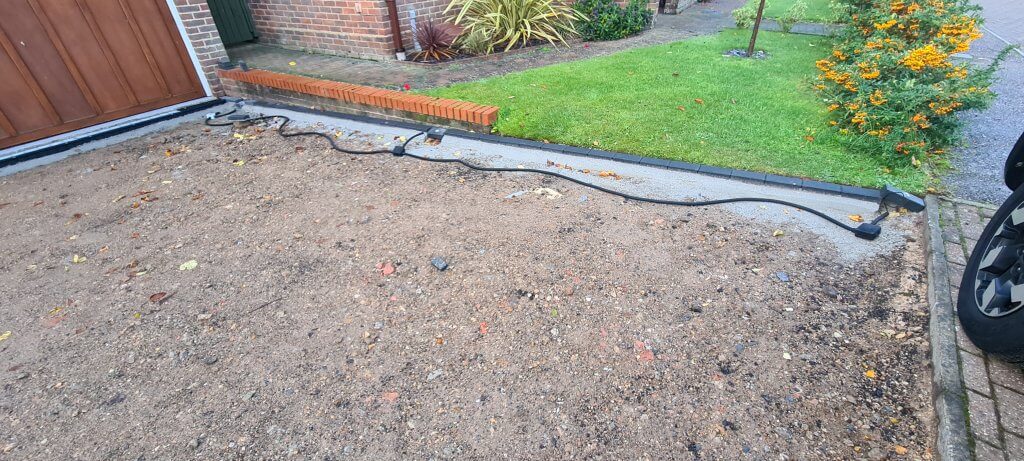
The Wiska box and conduit are buried under the type 1 with the flex from the drive over light being tucked under the engineered brick once inserted to allow the light to be changed if it should fail in the future.
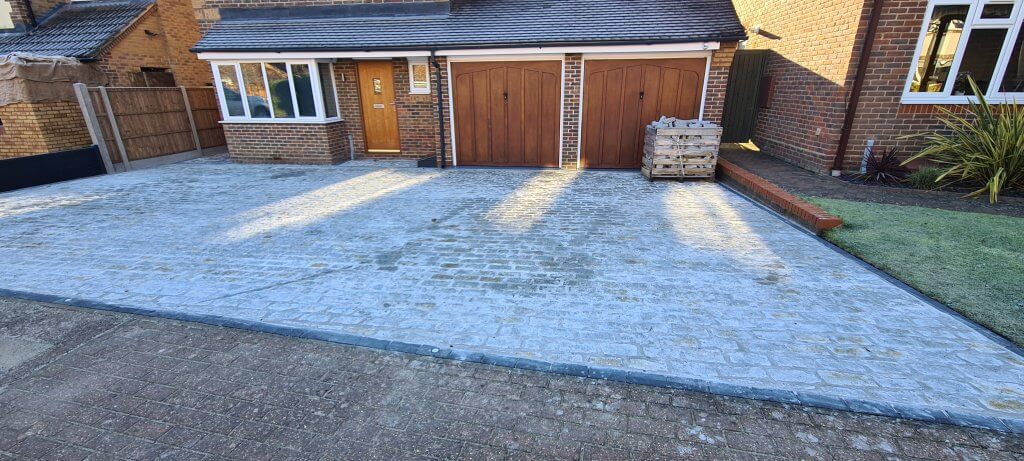
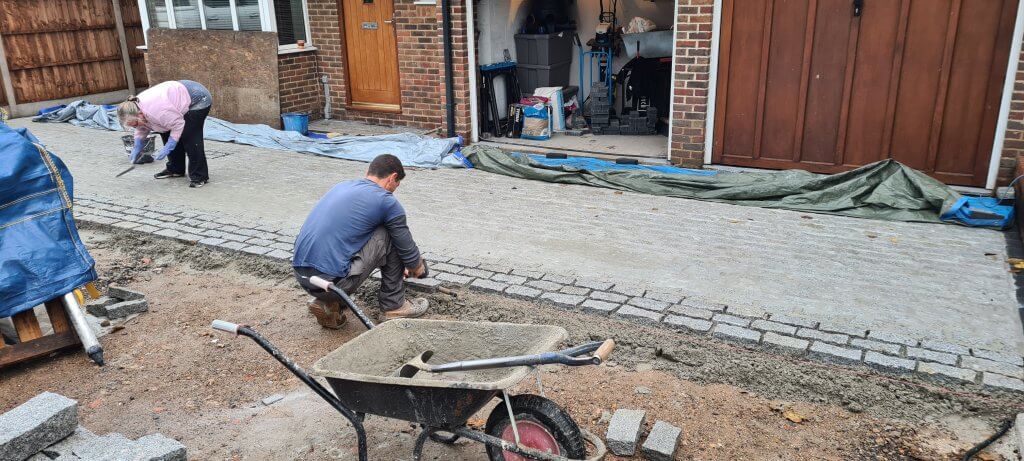
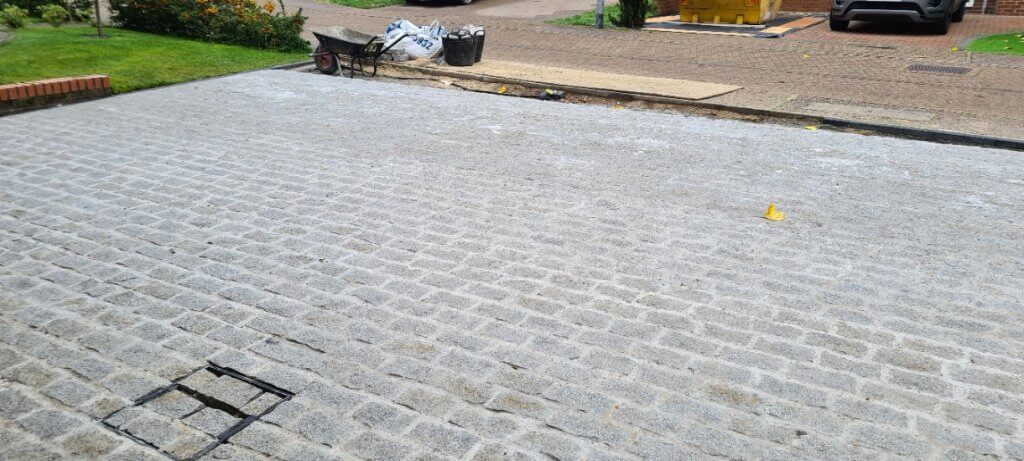
Paviours and Granite Cobble Setts
Now the lighting gear has been installed it’s time to get ready to lay the engineered bricks that frame the cobbles and the cobble setts themselves but first a layer of MoT type 1 and the broken up tarmac needed to be spread across the site and then compacted down with the Compactor Plate. A string line was pulled across the site to give a level for the crush that would allow for 50mm of cement and then the 30 to 70mm for the cobbles which themselves vary a fair amount in depth. By moving the crush around and using the whacker plate the required level was achieved ready for the bricks to be laid.
Then the engineered grey edging bricks were laid. This defined where the top of the drive surface was going to be. Both the engineered edging bricks and granite cobbles are being laid on a sharp sand and cement mix that is fairly stiff in consistency, not too wet. The bricks a tapped down with a rubber mallet to give the desired level. The cobbles being fairly uneven in shape means that knocking them into position is not a precise science but a case of making the high spots all level with each other.
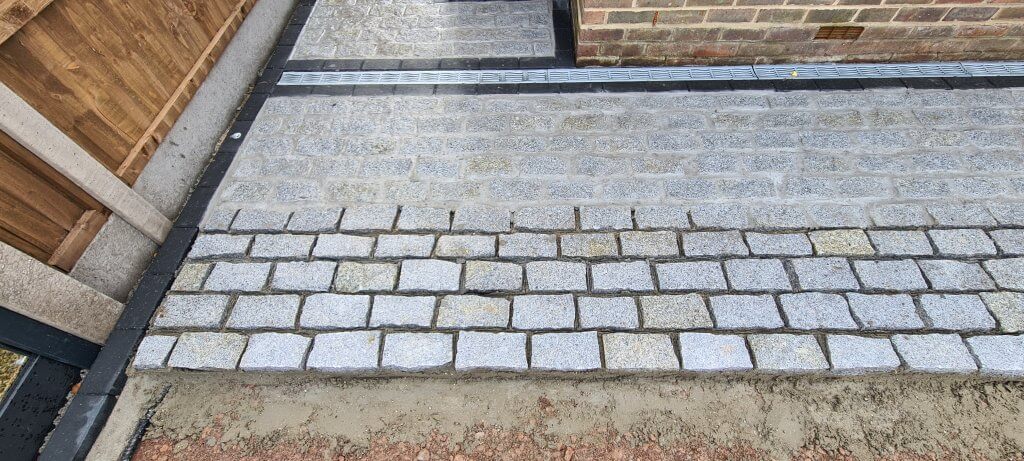
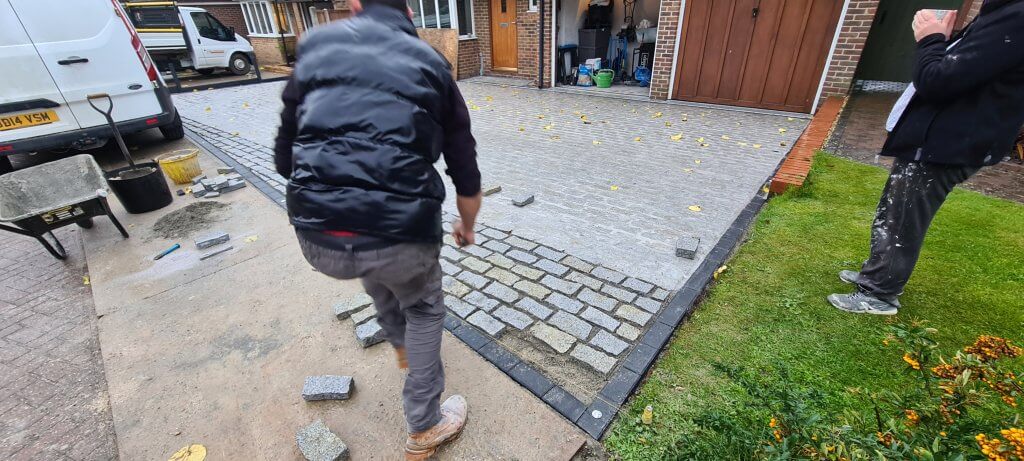
An angle grinder was used to cut the granite for the half bricks at the end of the rows with the aid of a pressurised water bottle with foot pump and 3m hose for dust suppression. A manhole frame cover was used to go over the now sunken chamber and rodding eye enabling cobbles to be inset into the frame cover.
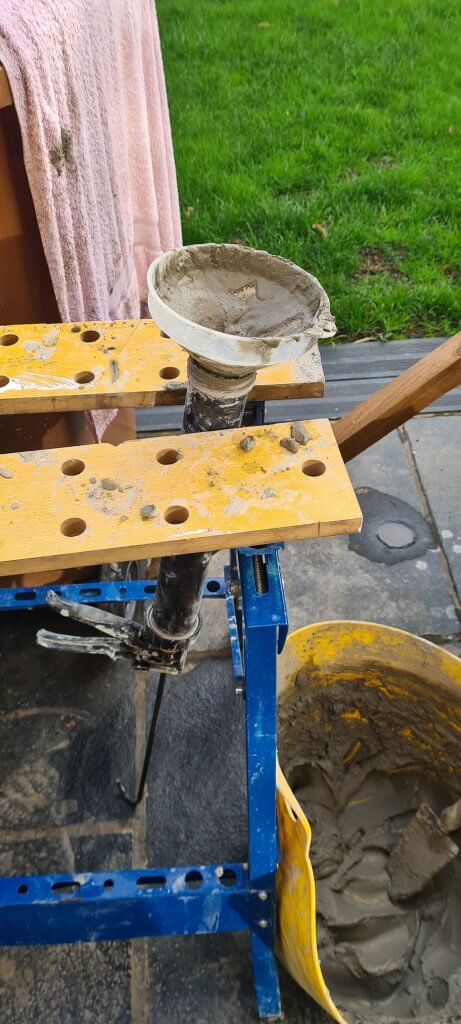
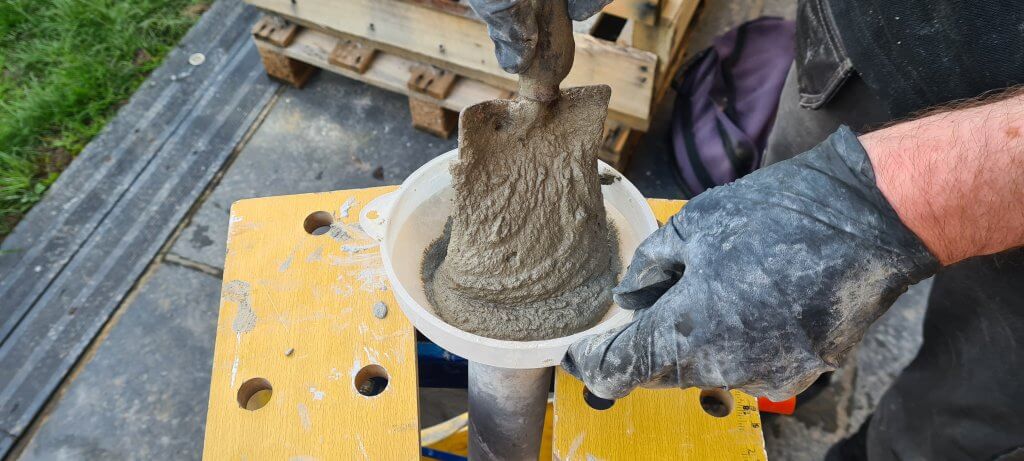
Gunning in the Gunnable Pointing Mortar
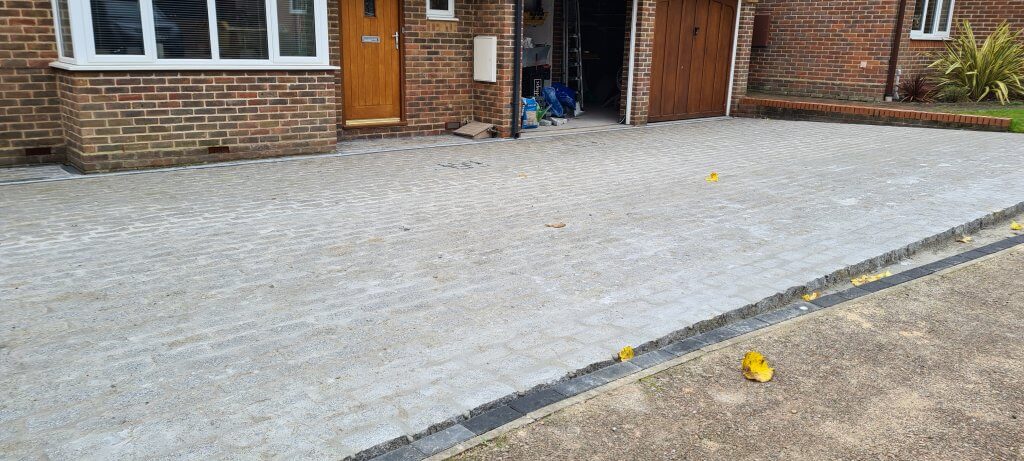
A gunnable pointing mortar was chosen for its structural properties as it dries very hard giving the cobbles a very strong construction. We mixed up one 25kg bag at a time with a mixing paddle in a trug bucket. Once mixed we trowled the mortar into the mortar gun using a cutdown funnel. We let the mortar go off for half an hour before striking the mortar joints and then leaving it again another half hour or so before washing off the excess with a sponge. The final stage was to wipe the cobbles clean. The process is very labour intensive and time consuming but is a fairly clean way of getting the grout efficiently into the gaps of the sharp uneven joint faces that make up the granite cobble setts.
The last job was to fill the gap between the channel drain and the step into the garage with the gunnable mortar feathering it into the slope of the existing concrete garage floor.
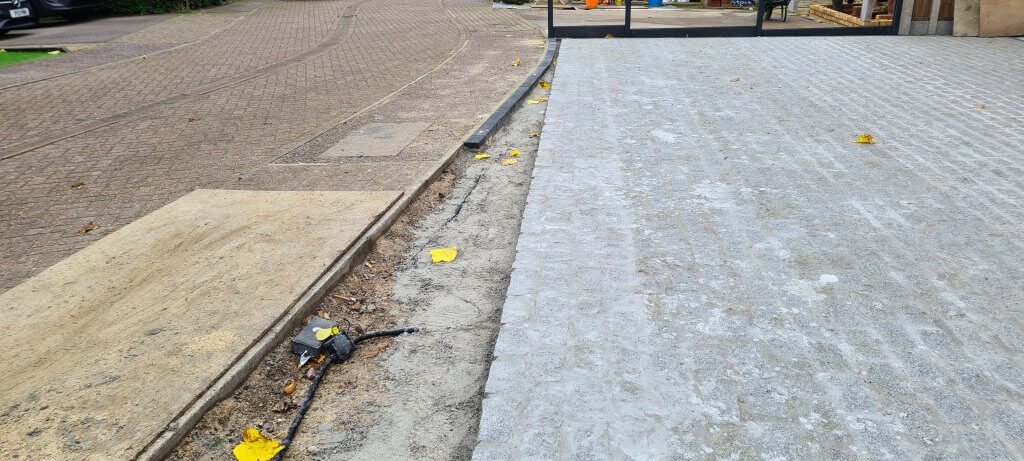
It has taken five weeks to transform a disintegrating drive and overgrown front lawn into a brand new cobbled driveway enhanced with drive over lights and black edging stones. The last job will entails cleaning the grout haze from the cobbles once we get a few dry days and then finally placing a couple of tall planters on the edge to soften the effect.